


🌟 Elevate Your Lawn Game with Zero Effort!
The Flymo EasiLife 150 GO Robotic Lawn Mower is designed for smaller gardens, effortlessly cutting up to 150 sq m with ultra-quiet operation at just 58 dB(A). It features Bluetooth application control for easy scheduling and troubleshooting, along with advanced sensors for optimal navigation and lawn care. Compact and lightweight at 6.1 kg, this mower is the perfect solution for a manicured lawn without the hassle.
| Manufacturer | Husqvarna UK |
| Part Number | 9704785-01 |
| Product Dimensions | 51.8 x 33.7 x 21.5 cm; 6.1 kg |
| Item model number | 9704785-01 |
| Size | 150 |
| Colour | Orange and Grey |
| Style | EasiLife GO |
| Material | Alloy Steel, Plastic |
| Pattern | Single |
| Power Source | AC/DC |
| Item Package Quantity | 1 |
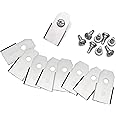
| Included Components | 1x EasiLife 150 GO Robotic Mower, 4+5 x Couplers and Connectors, 150 x Staples, 100m x Boundary Wire |
| Batteries Required? | No |
| Item Weight | 6.1 kg |
L**T
So Far So Very Good (Easilife Go 150)
The media could not be loaded. This is a review of the Easilife Go 150I'm writing this review a week after purchase (7th April 2022) and will update at regular intervals.First thing to note is that there is no real difference in new Easilife Go 150 / 250 / 500 range of lawnmowers. The only difference is the length of boundary wire and pegs you are given. My garden is around 100m squared and the amount of boundary wire provided by the Easilife Go 150 was more than enough. This was an impulse buy for me after receiving a notification on my Amazon app. I had been looking for a new lawnmower but hadn't considered a robotic lawnmower as I was under the impression they didn't really work properly. However, after reading the reviews and looking up reviews on YouTube I was convinced that they work well and that the price at the time was a cheap as they ever have been on a deal (I paid £372.99 for the 150 model, the 500 model was available for £409.99).Set UpAfter reading the reviews I expected the set up to me much more difficult and time consuming than it was. I have a relatively simple rectangular shape garden and I managed the set up in under an hour. It is much easier to follow the official Flymo set up video on YouTube (just search for it) than to follow the instructions provided. I am not a very practical person or a major DIYer but I managed it with ease. Also managed to connect it to my Android phone (Google Pixel 4a) with ease first time. By the way, you don't need to use a phone app to for the lawnmower, it can be used standalone without the phone, it just makes life easier.First StartI was a little perplexed at first that the lawnmower was sitting in it's charging dock and not moving despite me telling it to start both manually on the lawnmower and on the phone app. However, when I moved it from the charging dock to the grass it started working. I later realised that it will not move from the charging dock at first until it reaches 100% charge. So if you wonder why it will not move from the charging dock on its first use, this will be why. It worked its way around the garden and found its way home to charge when the battery it went down to around 20%. Then it moved back out again when it was fully charged. I have set it to mow for 4 hours a day but I will adjust as time goes on. I expect it will only need to be on duty 3-4 times a week.Cutting and PerformanceIt did a very good job cutting the grass down. It makes very small cuts and does not collect the grass but leaves it on the lawn. I thought this would be an issue but it wasn't. You don't notice any of the cuttings on the lawn unless you look very closely. I have found that the cuttings have increased the quality of lawn already, as the cuttings naturally fertilises it. I started at the highest cutting height (3) and the reduced it to the middle cutting height (2) which is perfect for me. The advice is to gradually reduce the cutting height. I didn't take any notice of this, and sure enough, I paid the price - it cut through a part of the boundary wire that was a little high. However, this was easily fixed (2 minute job) by using one of the spare electrical wire connectors provided. After this I also bought an extra pack of 20 wire connectors from Amazon for £7.99 for potential future use. Well worth an investment. Lot's of people recommend burying the boundary wire when first setting it up, but if you do this it will be difficult to find any wire breaks in the early weeks when potential problems are likely to arise. As the weeks go by the wire will gradually sink into the lawn and get overgrown by grass anyway. I main problem is that people ignore the advice to put the boundary wire at least 10cm away from the edge in the hope of a closer cut of the edge of the grass, but if you have a weeds, clumps, dips or bumpy ground beyond the wire the lawnmower will lift or fall and in doing so change the angle of the cutting blades and potentially cut the boundary wire. I find that it edges the lawn perfectly with the boundary wire set 10cm away.A Note on Changing the Cutting HeightAt first I just couldn't work out how to change the cutting height and the advice on Amazon Questions seemed different from different people. A lot of people told me I just had to turn a knob that didn't exist on my model. I have since discovered that there have been subtle changes to the models over the years. My current 150 model is the latest model and was released in February 2021. On these newer models you have to take the small top cover off (the black plastic bit, not the main orange cover) and there you will find a hex key. You then flip the mower on it's back and unscrew the blade mechanism and place it back on the mower on a different setting that is outlined. Easy when you know how but this took me ages to work out.Neighbour's and Dog's Best FriendA big bonus is that it is very very quiet, unbelievably quiet. You will be able to set it off to cut the grass at any time without disturbing the neighbours. Indeed it is very relaxing and meditative to watch. Also, my dog used to go absolutely mental when I used my hover mower to cut the grass and I was worried he would also bark at the robot mower. Praise the Lord, he takes no notice of it at all and this has saved me a lot of stress as no more unhappy spouse and children as the dog no longer bounces up and down at the patio doors like a demented banshie for an hour or so while I cut the grass.Final WordsIn short, if you're tempted to buy this but not sure. Take the plunge and go for it. It is my favourite buy of the year so far. I love it. Easy to set up and works brilliantly.
M**R
Long setup but worth it. Not the most intelligent machine
As a long time robot hoover user I've had my eye on one of these for a long time. I finally bought one and so far am glad that I did.Overall i am extremely impressed, I can now go away and not worry about coming home to an overgrown lawn. I also don't need to worry about collecting and dealing with grass clippings because it all gets mulched as it goes. I'd recommend this to anyone.Initial setup, lessons learned... so unlike my robot hoover, this lawnmower requires you to install a boundary wire around the perimeter of the garden and around any obstacles you don't want it to run into. You can either cut a groove in the lawn and place it in that, or use the supplied stakes to hold it down while you wait a few weeks for the grass to grow over it and pull it down. I opted for a groove which i thought might take me a couple of hours maximum to create. Over a day later and with some help I completed the wire lay! A couple of weeks later I needed to adjust parts and add a guide wire and do opted this time to just stake it down - this was much much easier! if you take this option, leave the cutting height at its highest to avoid risking cutting the wire while it beds in.Wire placement - the boundary wire needs to be a set distance away from the edge. The distance is adjustable between 20cm to 30cm in the app, but has to be the same everywhere. If you have any cut borders you'll want it to stop before it drops its wheel into it because it will struggle to get back out of anything more than a 2cm drop. Obstacles over 2cm in height don't need the wire if you don't mind the lawnmower colliding gently with them and changing course (small trees are fine).Guide wire - I thought this might be optional, but the mower is not very clever and really struggles to find its dock without it. Again this is nothing like my hoovers which easily dock. You will need to install the guide wire which also helps guide it to other parts of the lawn if like me you have a side section.Noise - it is fairly quiet. I can hear it from inside if it is quiet inside, but nothing that bothers me at all.Coverage - on my first few cuts I let it run 6 hours a day. It will cut for about 1 hour, charge for an hour and then come back out. Mine is the 500 model and I suspect the only difference is the amount of boundary wire you get in the pack and not the battery size. I now cut for about 2 hours a day (which means setting it for 4 hours to allow for charging) and it seems to cover it very well.Dog poo - I have a Labrador so I try to pick up daily if he has poo'd on the lawn. I have missed a poo a couple of times now and the mower just drives through it. The blades on these are small almost razor blades, so it doesn't explode the dog poo everywhere, it just gets smeared about a bit and dragged over the wheels. You can hose the machine down so its easy to clear up.A great bit of kit and means I can spend my garden time doing other things.
Trustpilot
5 days ago
2 months ago