🚀 Elevate Your Gaming Experience!
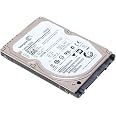
The Seagate 1TB Gaming SSHD is a Solid State Hybrid Drive designed to enhance your gaming and performance laptop experience. With a 1TB capacity and speeds up to 4x faster than traditional HDDs, it offers a seamless upgrade for your PC, Mac, or gaming console. Featuring 8GB of NAND Flash and a 64MB Cache, this drive ensures efficient performance while maintaining a cost-effective solution. Plus, it comes with a 5-year warranty for added reliability.


| Standing screen display size | 2.5 Inches |
| RAM | 1000 GB |
| Hard Drive | 1 TB Solid State Drive |
| Brand | Seagate |
| Series | Laptop SSHD |
| Item model number | ST1000LM014 |
| Hardware Platform | PC; Mac |
| Item Weight | 3.2 ounces |
| Product Dimensions | 4 x 0.4 x 2.8 inches |
| Item Dimensions LxWxH | 4 x 0.4 x 2.8 inches |
| Color | Black |
| Flash Memory Size | 1 |
| Hard Drive Interface | Serial ATA-600 |
| Hard Drive Rotational Speed | 5400 RPM |
| Manufacturer | Seagate |
| Language | English |
| ASIN | B00B99JUBQ |
| Is Discontinued By Manufacturer | No |
| Date First Available | March 5, 2013 |
P**X
Great Product, install instructions if needed...
I'm writing this not only to give positive reviews for these two products, but to consolidate the hours of research and trial/error I did during install:OEM: HD - Fujitsu 320 GB HDD - mhz2320bh g2 ATA, 5400rpmRAM - 4.00GB (3.75 useable); 2x 2GB, 800MHZ, 200-PIN, PC2-6400, Sdram (Sodimm); DDR2 800, CL=6NEW: HD - Seagate 1 TB SSHD, 6Gb/s, 64 MB Cache 2.5”RAM - Komputerbay 8 GB (2x 4GB) PC2 DDR2-800 SoDIMM Dual ChannelInstall of new hardware on HP dv7 1245dx:I installed the RAM and SSHD at same time.1. Before opening up computer, I backed up my OEM drive to an external drive. Also, whenever opening up the laptop, be mindful of static electricity. I wear nitrile gloves to avoid any discharge. Doesn’t take much to cause issues.2. RAM: Laptop recognized RAM automatically after restart and utilized right away. Showed up in System Information screen. Noticeably faster. Awesome. I also noticed that my fan, which usually runs at high speed about half the time, didn’t run high at all during all of this.3. SSHD: This computer has two hard drive bays. You can install the new drive into either bay. The original bay (on left) will be labeled “0”, and the second one is “1” in the Disk Management program in Windows 7. Since having both hard disks in the laptop, I was able to do all the following from the same laptop. Did some internet searching, but here’s how I installed new SSDH:a. Start type, “Create and format”; should get a menu item that reads full, “Create and format hard disk partitions”.b. This will bring up the Disk Management program from which you can interface with the hard drives on your computer. My new SSHD was labeled default, “Disk 1”, and reading as, “Online”.c. Right click on Disk 1 New Simple Volume… This will allow you to copy files to that drive.d. Assign whatever letter and name you want. It will get changed by Windows later to C:. (I named mine “A:”).e. You should be able to now see the new drive show up in Windows Explorer.f. Now to install from OEM to new drive to become the primary. (If you simply want your new drive to be the secondary, then copy and paste whatever you want to the new drive – it does not need an OS to do this):i. I used Macrium Reflect Free. Install this or whatever mirroring software you choose.ii. My OEM drive has a C: partition and a D: Recovery partition. If you copy both these to the new drive, then the new drive will use only the amount of memory that is required for these drives, and deem the rest of the new drive as “Unallocated”. You can extend the memory range only for the partition that is physically next to this unallocated partition within Disk Management. If you copy both the C: and D: partitions of the OEM drive, then the D: Recovery partition will be the only one you can extend, as it will be physically next to the unallocated partition. So…iii. Using your mirroring program of choice, copy ONLY the C: partition. This will allow you to extend the memory space of this partition to all but a small amount of the new drive. May take a couple hours. (*Note: One of the options is to create a Dynamic partition. This will allow that partition to communicate with other separate drives. I didn’t find this necessary.)iv. Go back into Disk Management and make a New Simple Volume of this small space on the new drive. Label as, “Recovery”. (*Note: I was not able to copy the D: Recovery partition from the OEM to the new drive. When I tried through Macrium the last screen prior to initiating this move said it was going to format the A: drive. You may be able to get this work.)v. Go back to Disk Management (via, “Create and partition” in Start search bar). You should see a clone of your C: partition on your new drive, and a formatted, empty D: Recovery partition.g. (After some internet searching it was said that I would need to change the boot order within BIOS to read the new drive first during boot. However, I found this not to be necessary.)h. Shut down laptop and take the OEM drive out of the left bay and put the new drive into that bay. Leave the OEM out for now.i. Reboot. This may take a minute or so due to system reconfiguring.j. Check Windows Explorer. The new drive, now in the left bay, should show up as C: and D: Recovery. This is now the new boot disk for the laptop. It may even be a good idea to restart, just to make sure all is in order with the new drive.k. You can put the OEM drive into the right bay if desired. Windows will automatically label the partitions in the OEM drive. This is a nice alternative to having an external drive. You can use this as a backup or whatever. It’s nice to have immediate access to an old version of your files in case something happens within the new drive.4. Hopefully this was helpful. I did a lot of trial and error using general guidelines found online, but didn’t find anything for my specific laptop. Good luck!
M**R
The best HDD upgrade for your ps4. Period. Plus tips to install it that will save you hours of potential frustration. Cheers !
I bought this for my ps4 about three months ago. I love it. I really like how easy it is to change the internal HDD on the ps4. The only part that I had trouble with installing this 1TB hybrid was with getting the firmware for the ps4 to be recognized by the ps4. I downloaded the 858mb file or whatever size that download was from the play station website. That was a nightmare...I kept getting error messages and I was almost pulling my hair out for hours! Fortunately one of my best friends is a computer networking specialist. He figured out that I had made a clerical error when naming one of the folders that the ps4 has to read to install the firmware to the Seagate hybrid HDD. Also, make sure you upload all your save files to the playstation cloud PRIOR to removing your OEM hard drive that was included when you purchased your ps4. If anyone needs help installing this drive, feel free to message me. I'd gladly help someone avoid the flash drive issues that I encountered while trying to get the ps4 to re initialize its operating system. Another important point I read is that the ps4 doesn't always like flash drives bigger than 8GB. I HIGHLY recommend just buying a new 8GB flash drive for like 7$ and use that for the ps4 firmware. Also, make sure you download the bigger 858mb file on the playstation website; NOT the smaller update file. Go all the way down to the bottom of that page. It's not completely clear to do that when you go to download the firmware. As far as changing the hard drive itself....it's ridiculously easy. It's only 5 Philips head screws. Just go to the hardware store and buy a Lutz 2-in-one green Philips head screwdriver and you'll be good to go. Overall this HDD is fantastic. It definitely improves load times for games that have longer loading screens like Destiny and The Evil Within. It has a 6GB per second speed when installing games and a 22GB game like Destiny was ready to play in less than 10 min!! My last tips are: make sure you install the game you want to play first and THEN download the save files for that specific game after its completely installed. You need to rinse and repeat that process for every single game you own unfortunately. And FINAL point.....buy a PS+ membership PRIOR to removing your old hard drive. If you have a ps+ membership you get free cloud storage for your saves and you DONT have to mess with game saves on a flash drive. Even if you don't want ps+, buy a 3 month membership JUST to make the installation of this hard drive and to download your cloud game saves on to the Seagate drive. It could possibly save you hours of frustration since the ps4 DOESNT recognize every brand of flash drive and losing all your game saves and progress would be the worst possible thing that could happen. Well that's it. Good luck to all. This is a great hard drive and I'm glad Sony allows and encourages us to install a bigger hard drive....not being able to upgrade your hard drive on the Xbox one is ridiculous. And internal hard drives are better than external HDDs plugged in with a usb.
Trustpilot
4 days ago
2 weeks ago