💪 Seal the deal, save your gear, and never miss a moment outdoors!
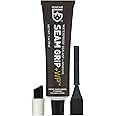
GEAR AID Seam Grip WP is a professional-grade, waterproof polyurethane adhesive designed to permanently repair and seal seams and holes in outdoor fabrics like tents, sleeping pads, and awnings. With a flexible rubber finish that bonds to multiple materials and covers up to 12 feet per 1 oz tube, it ensures durable, weather-resistant protection for your gear—perfect for millennial adventurers who demand reliability and longevity from their outdoor essentials.


| Brand | GEAR AID |
| Specific Uses For Product | Fabric, Tent, Awning, Camping Gear, RV, Boat |
| Material | Polyurethane |
| Item Form | Gel |
| Special Feature | All-purpose adhesive |
| Color | Clear |
| Item Package Quantity | 1 |
| Package Information | Tube |
| Item Volume | 1 Fluid Ounces |
| Viscosity | High |
| Full Cure Time | 12 Hours |
| Water Resistance Level | Waterproof |
| Unit Count | 1.0 Ounce |
| UPC | 021563105100 626298929153 |
| Number of Pieces | 1 |
| Global Trade Identification Number | 00021563105100 |
| Manufacturer | GEAR AID |
| Item Package Dimensions L x W x H | 7.91 x 4.61 x 0.87 inches |
| Package Weight | 0.05 Kilograms |
| Item Dimensions LxWxH | 5 x 2.25 x 8 inches |
| Item Weight | 0.05 Kilograms |
| Brand Name | GEAR AID |
| Country of Origin | United States |
| Warranty Description | 2 Year Warranty |
| Model Name | .... |
| Suggested Users | Unisex Youth |
| Number of Items | 1 |
| Part Number | CMP0458 |
| Model Year | 2023 |
| Style | 1 Oz |
| Included Components | 1 Seam Grip WP |
| Size | 1 Ounce |
| Sport Type | Camping & Hiking |
ترست بايلوت
منذ شهر
منذ أسبوع