
Desert Online General Trading LLC
Dubai, United Arab Emirates
Desert Online General Trading LLC
Dubai, United Arab Emirates
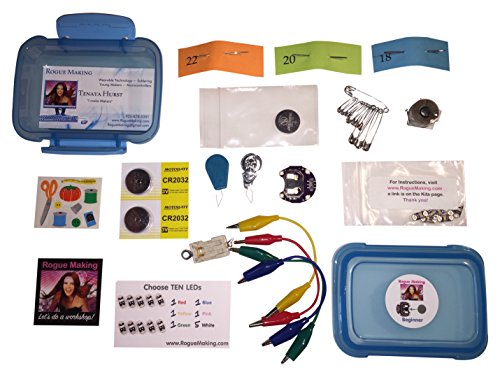
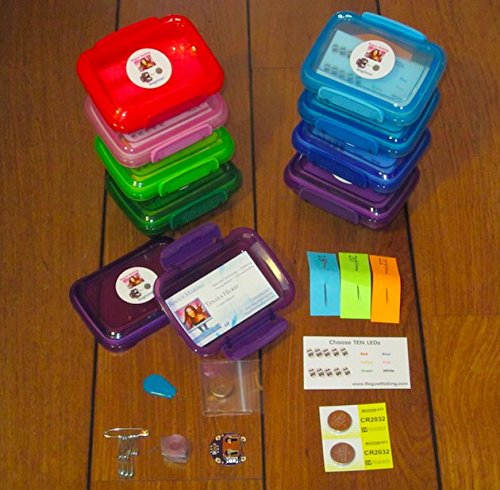
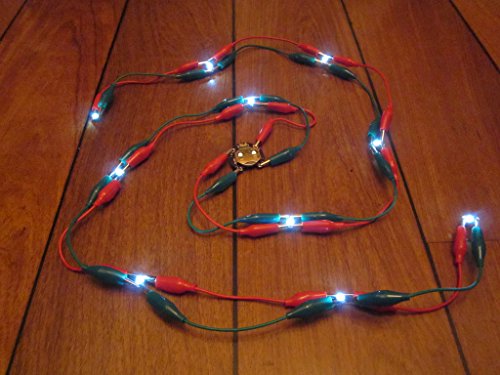
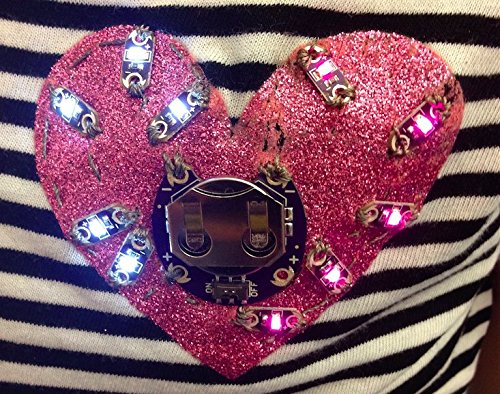
Tenaya created the Beginner kit for the Maker who wants to get started sewing with conductive thread. Prototype with alligator clips first, or you can use the conductive thread, clear tape, and paper to see the circuit working before you sew. Ultimately, you will sew the circuit which takes a little longer, but make sure to take the time in the beginning to prototype. There are 2 battery holders provided to make 2 projects using 10 LEDs provided in a variety of colors. Just remember scissors, and you can easily make wearable tech while on a road-trip or even on the train or plane! Full instructions available at RogueMaking.com Sew around the holes of your components just like buttons – 4 to 6 times. Tie lots of knots when you begin or end your thread. For regular thread, sewing with a double thread is a good thing, but use only a single thread when sewing with conductive thread. Imagine your circuit as a ladder and the LEDs are the rungs; you’ll sew one side, connecting all the positive sides of the LEDs to the battery holder. A 2nd thread connecting all the negative sides of the battery holder and LEDs. The tan battery holder has 1 + pad and 1 - pad. On the Lilypad, there are 2 + pads and 2 – pads, so if you use both sides to make 2 circuits, 4 separate threads should leave your Lilypad battery holder to create 2 sides of the circuit. You only have to use one + and one -, but you have options! The tan battery holder has no switch, but the Lilypad does. Most importantly as a Maker, learn to fail and learn by trying it! We’re all on the side of the electricity working. These materials are safe and if short circuiting happens (where electricity isn’t going through the LEDs, but is going straight back to the battery), there will be no melting, the battery will just drain. Replacement batteries are readily available at a low cost on Amazon or Ebay, but a little pricey at a regular pharmacy store. For more inspiration, go to RogueMaking.com
Trustpilot
1 month ago
1 day ago
1 month ago
5 days ago