Desert Online General Trading LLC
Dubai, United Arab Emirates
Desert Online General Trading LLC
Dubai, United Arab Emirates


🌟 Unleash Your Inner Colorista with Nature's Touch!
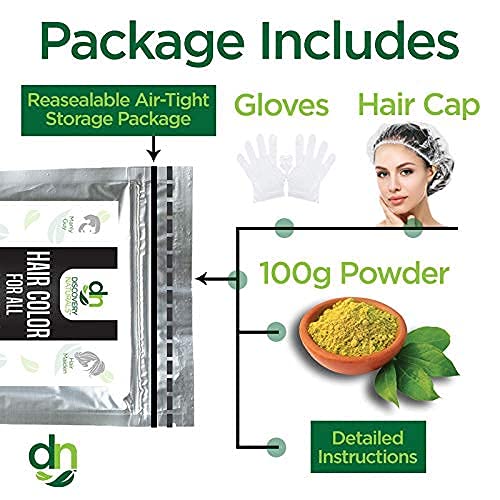
The Brown Henna Hair Color For All Kit offers a 100% natural, vegan, and chemical-free solution for vibrant hair and beard coloring. With a unique blend of indigo powder, this kit provides permanent gray coverage and a rich, multi-dimensional color that lasts 4 to 8 weeks. Designed for easy at-home application, it includes everything you need for a professional finish while being gentle on sensitive skin.


E**N
Absolutely WONDERFUL! Read About My First Experience: Prep, Instructions & PHOTOS
This was my first time using Henna Maiden, and I would like to preface this review by saying I am absolutely delighted with this product! It's wonderful. First I'll give a brief background, and then I'll outline what needs to be done to have a successful go at using this product. I've also uploaded pictures.I'm a natural redhead, but now that I'm older I have a fair bit of grey, and need some help. Trying to maintain my natural red color that I grew up with has been expensive, as my hair is long, and my hair was paying for it as well because it grows quickly and the processing dried it out horribly. After a year my hair had the look and texture of hay, which was horrible and beyond remedy. After googling 'red hair' I stumbled upon this product. Now, why I had not heard of this before, I'll never know because I swear it's God's gift to redheads! It's affordable, beautiful, nourishing, it does not fade as other products (from what I've heard), and you can do it right at home - and it's ORGANIC! How can you beat that, right? So I did some research and gave it a go. Here is some pointers for you if you're a first timer like me. After doing this once, I realized very quickly exactly what needed to be done for a "better" or "easier" experience. So here goes...#1. AMOUNT: I have long hair down to my waist, but it's not as thick as it used to be. After reading reviews from others with long hair I decided to mix three packages of Henna Maiden Natural Radiant Red. I followed the directions explicitly. I will tell you that I had far more than needed and actually ended up wasting one third of it. So next time, I'll know better. For those of you with thicker hair, I would suggest the three packages.#2. MIXING: I did not add egg or oil. But I did use tea, which I have heard helps "set" the color or intensify it. I chose Earl Grey because it has a beautiful bergamot scent and a lovely color as well. Henna is an herb which smells very "green". It was not offensive to me at all! I actually found it quite therapeutic. But for those of you who want to cover that, then I suggest using the Earl Grey tea or essential oils. For the three packages I used FOUR CUPS of hot tea. This created a thick paste which resembled something you'd see in your infant's diaper. :)#3. PREP: Here's the key - you need to prep. I purchased the following before I applied the product:- a large inexpensive towel for wrapping my hair afterward - because the color does bleed immediately after.- petroleum jelly to line my hairline and cover my ears- a thick pair of rubber dish gloves (playtex). I do not suggest using the ones in the package as they split easily and are not form fitting.- celophane wrap or cling wrap to wrap your head. Again, I do not suggest using the shower cap in the package as it is quite thin and unstable.- an old t-shirt or two- small hair clips- large combNow that you have your items assembled, remove everything in your bathroom that would possibly be exposed to any potential dripping. Henna will stain on contact. I removed my bathroom rugs and towels, and items from my vanity as well.I began by separating my hair into segments. I know now that is an extremely imporant part of preparation. Because once your gloves are slathered in henna, separating and combing your hair for the next application will be virtually impossible. Therefore, as part of your prep, take the time to separate your hair into small segments all over your head with a small clip. I had washed my hair prior to application, and my hair was damp when I applied the product, which made it much more manageable.Take the petroleum jelly and go around your hairline with a good amount, including lathering your ears.#4. APPLICATION: Now that you have your hair prepped, begin applying the paste at the root working it in like you would a shampoo, and then draw it out gradually through the strands. The strands must be completely covered! Wrap that segment of hair to your head into a 'bun'. Apply a topcoat of paste to that bun. I suggest working at the front first so that hair is removed and you can clearly see what you're doing. Continue this process over the entire area of your head, wrapping the hair around that central 'bun'. When you're finished you should have all your hair secured to the top of your head. Then coat the entire head in henna paste. Once you've coated your head, begin wrapping your head in celophane. Leave no gaps.#5. PROCESSING: I allowed 2.5 hours for my hair. I found that to be more than enough time for the color I wanted. I washed my gloves carefully, donned them again, and began to unwrap my head. I made to sure to have a small trash bag at my side so I could safely discard the used celophane - because it can be a mess. Once my head was unwrapped I rinsed out the product with warm water by kneeling over the rim of my bathtub and dipping my head beneath the spigot. This worked perfectly, keeping all the runoff away from my face and other parts of my body. I allowed a good rinse for about 20 minutes. You'll find that there is a lot of bleeding and it took a long while before the water ran clear. Once it did, I washed my hair of any possible residue and applied a light conditioner. I used the special towel to wrap my hair and as expected, there was a significant amount of 'bleed'. Then I dried my hair.#6. RESULTS: The immediate results were shocking at first, I must say. For a bold personality such as mine, they had the ability to make me shy. :) The color was a bright orange (I used Radiant Natural Red). The color was extraordinarily intense and bright. Yet I held to hope that it would continue to do it's magic and IT DID. The next day I shampooed my hair again and I did not see a lot of color change until the SECOND FULL DAY. I will tell you that henna behaves much differently than conventional chemical dyes. The color turned a beautiful auburn that was absolutely stunning. I will tell you that I've received compliment after compliment from jealous women who were dying to know if that was my natural color. When I told them my secret they were stunned. (See photos) So if you use this product, please know that initially, the color can be extraordinarily bright and look a bit garish and gaudy. But by the second day it was absolutely GORGEOUS - precisely what I wanted. For those of you who are able - do it on a weekend. Process on Friday night and by Monday morning at the office, you'll be a knockout!#7. TEXTURE | MANAGABILITY: As for the texture of my hair, I am AMAZED. I've found that henna actually "healed" my hair. It no longer feels or looks like hay at all. It feels silky soft and it SHINES. Henna does make your hair feel thicker, because it does something to the shaft that is very therapeutic. So if you have fine hair (I have moderate - it is neither coarse or fine) you'll probably be thrilled with this benefit as well. My hair responded very well to a curling iron, and I am tickled pink at the results. Every one of my friends who have seen me since the process give an eye-popping "Wow!!!" with a huge smile. They've said, "I LOVE your hair!!!" And they're amazed when I tell them what I've done.I hope this post if helpful to all of you who intend to use this product. As for me, dipping my head into chemicals every 6-8 weeks for a price tag of $100 + for the rest of my life was no longer an option for me for numerous reasons (cost, chemical exposure, etc.). This procuct is a God-send and I will NEVER go back. I will have you know that I'm well stocked. :) I hope you try it and find the results to be just as GLORIOUS as I did!DON'T FORGET TO VIEW MY PHOTOS! Cheers!
M**A
This stuff is great. I have very very fine and thin hair ...
This stuff is great. I have very very fine and thin hair thats about chest length. I was really worried because the instructions recommended more that a package for a full head of hair but because my hair is so thin I only needed one. ( Id still recommend getting 2 packs if your hair is past shoulder length and normal thickness, if its past your mid back you may need 3. Try to find the chart of how much you need, its shown on the back of the the package.)I like this pack compared to buying henna and indigo separately because you can choose the color option that already has the perfect ratio of henna and indigo to give the desired color, rather than guessing because too much indigo = black and too much henna = redI was going for brown hair and i bought miraculous medium brown for 15.99. This was a drastic change for me because my hair has been chemically processed (to be blonde) a lot before this. I decided to go brown to I can stop worrying about brassy hair. Blonde hair is a lot of work to take care of and I could never keep it the cool ash shade I wanted without constantly putting in chemicals.The process is messy and smelly and takes a long time but its so worth it. I mixed the powder with half water and half apple cider vinegar and got right to work Covered my entire head and waited 2 hrs.As soon as your done make sure to wipe off everything before it stains. Wash your hands and ears and forehead and neck after if you see any henna on them. IT WILL STAIN YOUR SKIN if you leave it. I didn't wash of my hands and they were green and no matter how much you scrub it wont go, it will also really dry out your hands. Although I used the gloves at first I was having a hard time using them cause they are huge for my hands so near the end I used my bare hands to make sure everything was covered -bad idea. I did this a week ago and there is still a little green in the cracks of my knuckles and my hands are very dry were I left the henna. This was of course my fault and won't happen to you as long as you wash after using it.So many have complained about the smell. I laughed at the people who just add water and complain about the smell, I would like to see their reaction to smelling it when adding vinegar. Granted, its not a smell most would like in their hair, the smell of the powder itself is an earthy muddy planty smell. Adding vinegar will of course make the smell worse but helps a lot because henna works well with pHs around 5. The smell reminds me of matcha tea powder. If the smell is really that terrible add essential oils to make it better.Result:My hair absorbed the color very well, too well actually. It was more of a dark brown, probably because my hair was dry and light to start so it took in the color more. I'm still happy with it because it covered my brassy hair. I'm also happy because my hair actually does look thicker. Some people said it dried out there hair but as long as you condition well after you wash it out it shouldn't be a problem.
Trustpilot
2 weeks ago
3 days ago