


Full description not available


| Brand | Tic Tac Tiles |
| Material | Limestone |
| Size | 10"x10" 10-sheet |
| Color | Marmo Travertine |
| Style | Modern |
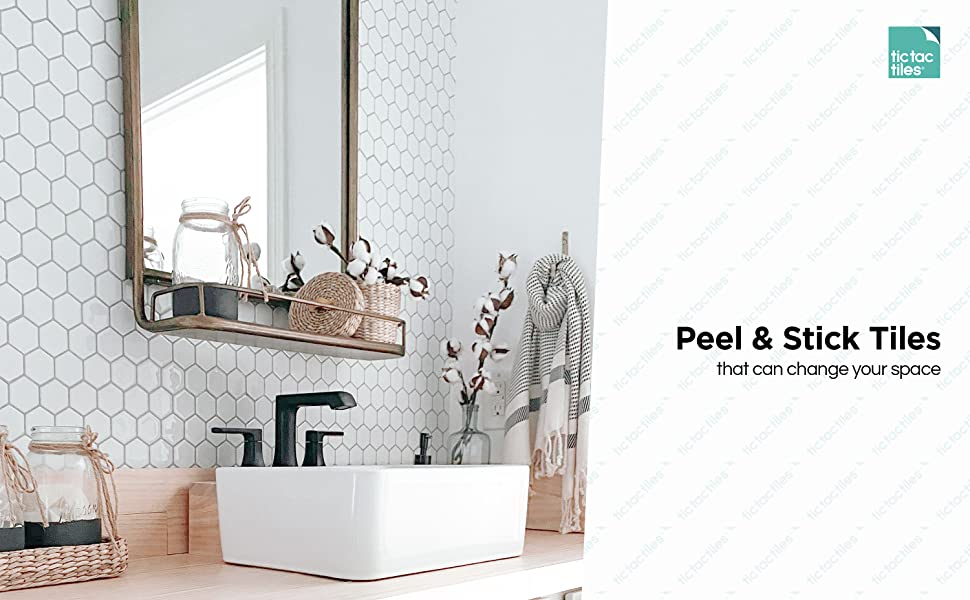
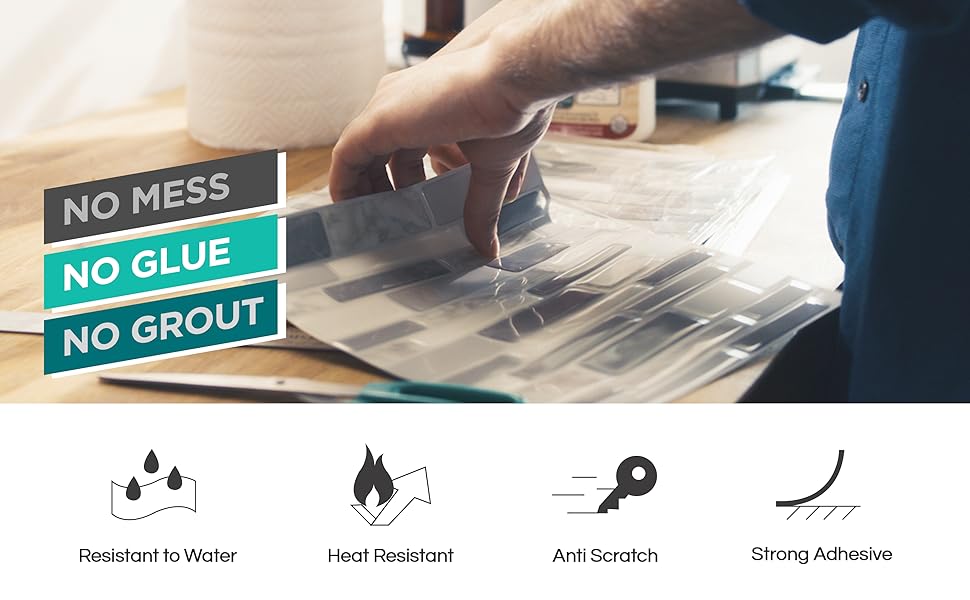
| Installation Type | Peel and Stick |
| Product Dimensions | 10"L x 10"W |
| Pattern | Square |
| Item Weight | 1.7 Pounds |
| Shape | Square |
| Edge Style | Square Edge |
| Unit Count | 6.94444444444444 Sq Ft |
| UPC | 636225638904 |
| Manufacturer | Tic Tac Tiles |
| Part Number | BSW06 |
| Item Weight | 1.7 pounds |
| Item model number | AHN-BSW06 |
| Is Discontinued By Manufacturer | No |
| Item Package Quantity | 10 |
| Mounting Type | Wall Mount |
| Batteries Included? | No |
| Batteries Required? | No |
R**H
Easy to use, look great!
I highly recommend this product. I found that it was reasonably priced in comparison with similar products, had relatively easy installation, and looks great. Feel free to comment with questions and I will do my best to reply. I will also try to update this review in a few months with info about how well it lasted.ORDERING & OVERALL INFO:I purchased this for use as a kitchen backsplash. Once installed, this product does looks like real tile, although it does not look like real travertine marble because of the sheen. The grid-style is fairly forgiving of imperfect installation, which is great because I have mediocre DIY skills. I ordered x2 packs of x10 tiles. I only needed about x14 tiles and could have ordered a box of x10 and a box of x5 but I thought it would be better to have extras for any possible future repairs. Online and in-person, the color looked beige until it was next to my beige countertops, which gave the tile a pink cast. However, once all of the counter items were in place, it wasn't noticeable and looked fine. The product description says this is not intended for use on textured walls but the installation worked out well for me. I did not use additional spray adhesive (which is not recommended but is mentioned by other reviewers) but I did run over the entire wall with a blowdryer once it was all installed, in hopes of helping the adhesive somehow. (I don't know, I'm not a big DIY person, lol.) I have included images of the overall process and the finished look. More info below.INSTALLATION INFO & TIPS:1. This took about five hours, including scrubbing the walls with bleach water to ensure there was no grease or anything on the wall that might impede the adhesive.2. I used sharp scissors, a very sharp paper cutter, an X-Acto knife, a measuring tape, ruler, Scotch tape or other easy-to-remove no-residue tape, and a hair dryer. The tile is a bit "gummy" so be prepared to clean your scissors and sharpen your paper cutter as needed during the process.3. I used Scotch tape to "hang" the tile sheets on my wall to sort of pre-measure and get a feel for how it would looks and how best to install it. Unfortunately, I discovered that neither my cabinets nor countertops are entirely level, so there was some difficulty during the measuring process.4. I used a paper cutter to make the big cuts, scissors to cut on "grout" lines and to trim places where I imperfectly measured. (I tried to use an X-Acto knife at the end to clean it up a bit, but that only half-worked.)5. I found that this tile was easy to stick on the wall - sometimes too easy as the tile can "grab" onto the surface before you're ready. When this happened, I had to peel and re-stick. I was able to peel and re-stick a few times in each place where it happened but it was clear that the tile lost some adhesion each time, so try to avoid it. Also, it's important to press along every single grout line as you install each time. As some other reviewers have mentioned, the peeling/re-sticking did some light paint damage. In my case, the paint was already damaged and I was covering it with the tile anyway so I didn't think this was a big deal.6. I found that solid alignment was absolutely key to getting a good overall complete look, so using a ruler and/or a level to ensure that the grout lines on each ran parallel to the others both horizontally and vertically is extremely important. However, because the "grout" lines on each tile overlap, once it was all installed, it was very difficult to tell if the cut wasn't perfectly straight or aligned. This made the installation fairly forgiving, even for someone like me with mediocre DIY skills.7. When I installed a whole tile, it was easy to remove the backing by using extra edge which is intended for that purpose. On tiles where I had to make cuts, it was easy to peel away the backing along any edge in the middle of a square but difficult to separate the backing from a "grout" line.8. The instructions say that this product should not be used on textured walls but the installation worked out well for me. I did not use spray adhesive but I did run over the entire wall with a blowdryer once it was all installed. I have included images of the overall process and the finished look.Hope this helps! Feel free to comment with questions and I will do my best to reply. I will also try to update this review in a few months with info about how well it lasted.
R**N
Easy to install, looks great!
I’ve never done anything like this before - other than wallpaper. This is not harder, just different. The adhesive is super sticky so it’s a little hard to line up the square. The squares are heavy(ish) but thin (make sense?) so they kind of flop around and can attach where you don’t want them to. So ... I cut off about 1/4 of the backing, then put the square where I wanted it, then slowly peeled off the remaining backing while smoothing it out. I used my paper cutter (for scrapbooking) to get straight edges on the cut pieces. . I like how it turned out. This is a one-person job - took me about an hour.
M**X
Easy to install and looks real
It took 38 tiles to do my kitchen (4 boxes). I had a window and 7 outlets to cut around and installation took 3 1/2 hours start to finish. That includes the time to wash the wall prior to installation. I didn’t use additional adhesive as this adhesive feels very secure even on my textured walls. I’ll update this if that changes. This was easy to cut and you just peel and stick onto the wall. I think it looks fantastic. From a distant, you can’t tell it’s not tile. I was nervous about trying this. Even after I received the sheets, I wasn’t sold on my decision. Once it was installed, I’m very happy! I would definitely recommend this!!
P**D
One star, because subsequent batches don't match the color!
Although the tiles look nice, the batches of tiles are different colors! My initial order of 20 tiles were all the same color, the color of the pictured item I ordered five more to complete the job, and the new tiles were a different color! I contacted Tic Tac Tiles, they asked for a picture, which I sent. They replied:"Once again, we are sorry that you received the different colored tiles.Since your order was fulfilled by Amazon we have no control on how products are chosen from the batch and sent to customer.If your new order has the same problem, please let us know so that we can open an investigation with Amazon.Furthermore, we will make sure to send the right colored tiles by searching our warehouse with the same batch number. "In other words, Oh, so sorry, you're screwed! Nowhere does the product description advise that there are batches of colors, and that you may get mixed batches which will be useless or worse, will screw up the entire job.My earlier review:Much will depend on how well the tiles stick over time. I will update this review to reflect that. I put the tiles over a painted surface. It was not perfectly smooth. They were fairly difficult to align and then stick in place without having the tile grab the surface prematurely and mis-align itself. Maybe this is because I live in the Phoenix area where we have powerful static, but the tile would actually pull itself toward the wall.Numerous times I had to pull the tiles away and try again. This also caused me to waste a couple of tiles because the adhesive is very powerful. The other issue is that the instructions say to press along every grout line after the tile is installed. However they do not include a tool to do this, so at first I was using my fingernail. But the next morning the outside grout line edges had detached. I remembered that I have a small pin-striping tool with a narrow roller, so I used that to press along the grout lines. It would be nice if they included an inexpensive tool for this purpose.Also, the backing is difficult to separate from the tile. I had to use a razor knife.On the plus side, the tiles look very nice and they're much quicker and easier to install than actual ceramic tiles. Three stars so far.Edit: I ordered a box of 5 of the same color, they arrived looking like a sickly version of the original color. Hope to god I can get matching tiles, or I'll be beyond PO'ed.
M**T
Looks like a sticker
Does not resemble tile at all
P**K
Not worth it
I didnt particularly like them. Sticking was a hassle as aligning them was not easy. They loose glue once stick them and then have to fix the alignment. It was hard to get the edge stick to the wall. They came out every 5 min.
M**L
These tiles will stick to anything!
Love these tiles and they stick really well. Looks lovely anywhere.
N**N
Tic tac tiles
Would not buy this product again ,because it peels off the wall.l found it disappointing it doesn't stick very well.
T**E
Tous les avantages d’une céramique !
Tous les avantages d’une céramique sans la préparation, les travaux et les coûts d’une installation de céramiques. De plus, très pratique pour ajouter un petit cachet. Je le recommande vivement.
Trustpilot
5 days ago
1 day ago
