
Desert Online General Trading LLC
Dubai, United Arab Emirates
Desert Online General Trading LLC
Dubai, United Arab Emirates


🚗 Illuminate Your Drive with Confidence!
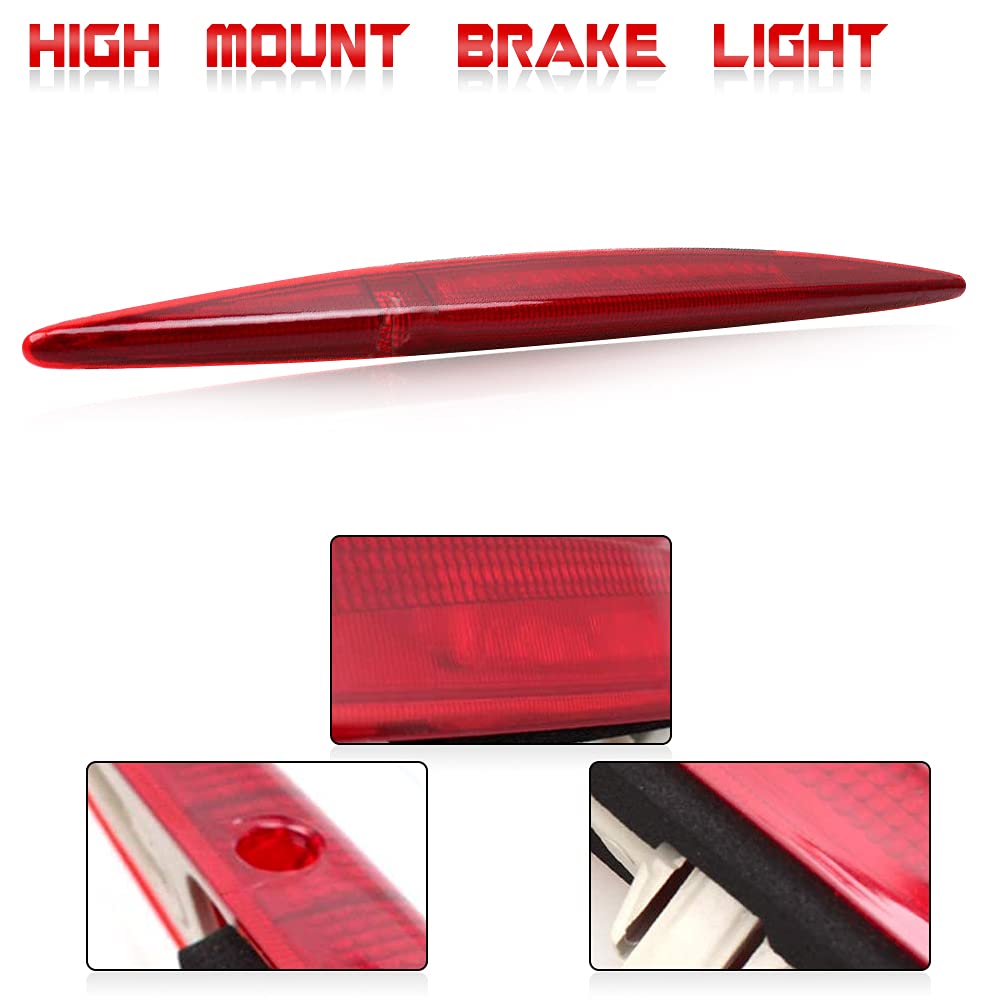
The Clidr Third High Mount Stop Light Brake Light is a direct replacement for Honda CRV CR-V models from 2012 to 2014. Made from durable, heat-resistant plastic, this brake light is designed for easy installation with strong adhesive tape, ensuring no modifications are needed. It is water-resistant, energy-efficient, and comes with a 30-day money-back guarantee and a 1-year limited warranty.
| Brand | Skdorpfm |
| Color | Red Shell |
| Specific Uses For Product | Exterior |
| Vehicle Service Type | Car |
| Year | 2012 |
| Special Feature | Waterproof |
| Wattage | 30 watts |
| Auto Part Position | Rear |
| Lens Color | Red |
| Lens Material | Plastic |
| UPC | 098185496978 |
| Item Weight | 1 pounds |
| Package Dimensions | 19.6 x 2.9 x 2.5 inches |
| Item model number | 8542089237 |
| Is Discontinued By Manufacturer | No |
| Manufacturer Part Number | 098185496978 |
| Special Features | Waterproof |
R**M
Third brake light
My mothers car needed a new light, ordered this for her Honda Crv. It was a perfect fit, couldn't even tell the original was replaced. Would order again if needed!
D**S
Works! Not a trivial install
We got this to replace a broken one. The installation is mild to moderately complicated and needs a socket wrench with an 8mm head, but is totally reasonable to do yourself with assistance from Youtube. (Beware of dropping the pieces into the inside of the door, making them unretrievable.) The prongs to plug the light into the plug were not aligned correctly in my version, which required me to adjust the prongs inside for a while to get the plug to go in, but eventually, I got it in. It works!
T**S
Good replacement
Good replacement for OEM. Excellent price. OEM is very expensive. Nice and bright.
S**X
Almost exactly the same a OEM
Was a perfect fit besides the seal being a little thicker then the OEM one , wasn’t a problem really though. Just need a 8mm socket and maybe a 4” extension to remove and install it.
P**L
Leaks, harness didn't fit.
Harness didn't fit - had to trim the harness receiver to get it to fit. Then, it leaks in the rain or carwash. Look elsewhere.
R**Z
Works, But.........
This is for those who would like to do this themselves, and don't have a lot of experience. The first thing you have to do is remove the plastic trim. There are 4 green catches that snap into the shell. There is a catch on both ends about 3 1/2 in. from either end. I simply started on the left side and squeezed the trim and pulled outward with just enough force to pop it out. I then worked to the right popping out the other three catches. I then grabbed the trim with both hands squeezing the trim pulling the trim to shorten it and that will release the end catches without breaking them. Remove the electrical connection by pressing down on the tab and pull the connector out. I used a curved pair surgical forceps. You could use Needle nose pliers. Remove the two 8 mm nuts. They are not centered in the opening. If you have someone hold the hatch down until the stud is plumb, it will allow you to get it off without losing the nut in the shell. There are two tabs on each side of the electrical connector. Just push down on them with a screwdriver and push out. When you get the second one you now can just pull the light out. Pull the electrical connector out of the shell. You want to make sure the connector fits correctly, Mine didn't, I had to bend the copper tangs upward because they didn't align. I also took a small, tapered file and widened the slot on the factory connector. The tangs on the new light are wider than the factory unit. Make sure it goes on. You could now step on the brake and see if if works. You noticed that there are no studs on the new assembly. I just took a pair Klein lineman pliers and slid them out. Everyone was right, the gasket supplied is way too thick, you'll never seat the light. I carefully removed the factory one with a single edged razorblade. I attached it with some silicon adhesive. It even repaired the gasket where I tore it. I put the studs in the new light and pushed the light into the opening until it clicked. That was never going to happen with the new gasket supplied. I then plugged in the connector, which now fits and installed the nuts. I squeezed/ bent the trim to engage the ends in their slots and just pushed the trim in until I seated all of catches. It was not a seamless installation. They need to match the gasket and electrical connection to match factory specs.
V**A
IT FIT THE VEHICLE EXACTLY, EXCELLENT
IT FIT THE VEHICLE EXACTLY, EXCELLENT
A**L
Poor quality
It was poorly assembled, to the point it wouldn't fit properly.
Trustpilot
2 days ago
1 month ago