
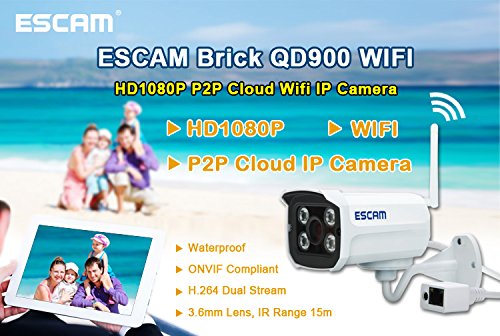
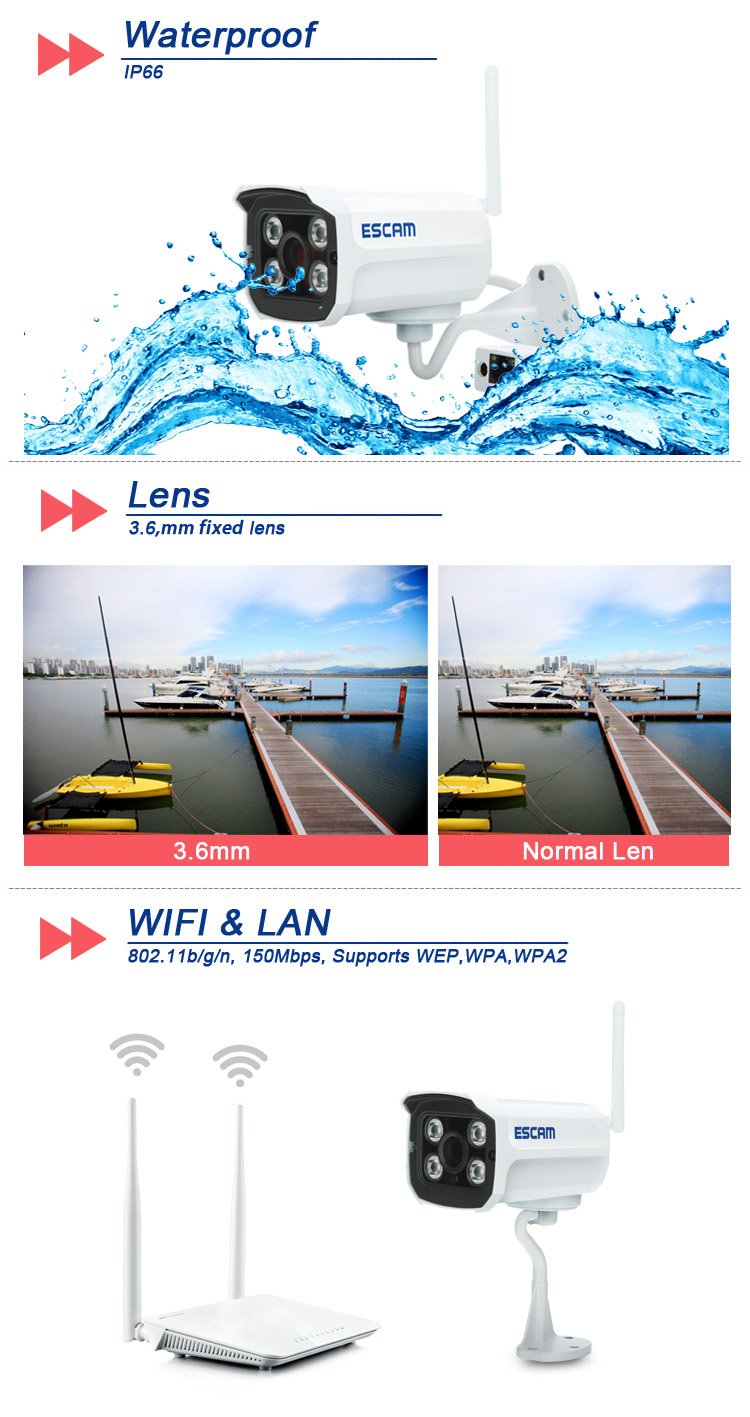

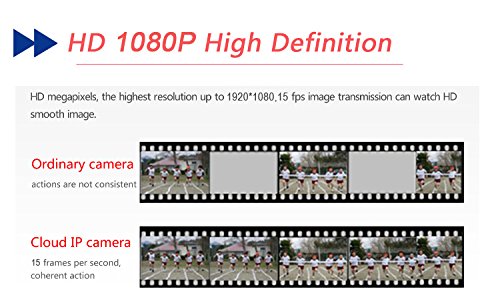


Model: ESCAM Brick QD900 WIFI Camera Image Sensor: 1/2.5” 1Megapixel progressive scan CMOS Effective Pixels: 1920(H)x1080(V) Scanning System: Progressive Electronic Shutter Speed: Auto/Manual 1/3(4)~1/10000 Min. Illumination:Color: 0. 1Lux/F1.2, B/W: 0.01Lux/F1.2,0Lux (IR on) S/N Ratio More than 50dB Camera Features Max. IR LEDs Length: 15m Day/Night: Auto(ICR) / Color / B/W Backlight Compensation: BLC/ HLC/ DWDR White Balance: Auto/Manual Gain Control: Auto/Manual Noise Reduction: 3D Privacy Masking: Up to 4 areas Lens Focal Length: 3.6mm Max Aperture: F1.8 Focus Control: Manual Angle of View: H: 75.7° Lens Type: Fixed lens Video Compression: H.264 Main Profile Frame Rate: Main stream:1080P(1920*1080) 15fps ; Sub stream: VGA640*360 25 fps Bit Rate: H.264: 16K ~ 8192Kbps Network Ethernet: RJ-45 (10/100Base-T) ONVIF: ONVIFVer.2.2 Max. User Access: 10 users Smart Phone: iPhone, iPad, Android Protocol: TCP/IP , UDP , RTP , RTSP , RTCP , HTTP , DNS , DDNS , DHCP , FTP , NTP , PPPOE , SMTP , UPNP Wi-Fi:WIFI802.11b/g/n,802.11b/g/n, 150Mbps, Supports WEP,WPA,WPA2 •Promise upon Customer Service: Due to some platform restrictions, we can not give any response directly under your reviews. So if you meet any problems about installation ,the using of the camera, ,network connection, factory setting.etc, please feel free to contact us with your order number or directly ask a question on the product page. We have professional technical support team from the manufacturer and it’s our pleasure to help address the confusions of every customer if you can kindly help bring it to our concern. Thank you. Twinbuys
S**R
ESCAM Brick QD900, Works if you can Set It Up.
Update: Removed a star. After one week, the 12v power supply (wall wart) failed, so I returned the whole business to Amazon. Indicative of poor hardware quality.The external camera build seems good, with a solid case and cable, but the software andfirmware has issues. The setup documentation and support is poor. If you can get it setup,it is good for basic viewing. I just use it to monitor the front of my house, nothingfancy.The price of the camera is good amongst the world of surveillance cameras, being on thelower end. There is no CD provided, since the camera now seems to have the web firmwarebuilt in. There is reference given to a website escam.cn and a Youtube video, The websitedoes not exist and the video is for a previous model. Fail!The one sheet of instructions provided are out of date and you will not be successful usingthem. Warning: You must be able to setup a basic device on your home network. If thispuzzles you, this is not the camera to buy.Here is the basic quick start setup for the camera, since this is not written anywhere:1. Plug in power, and ethernet cable to your network router from the camera.2. You must use IE Explorer for this because of ActiveX player. Sorry! On the bottom ofcam is a label with important info. IP address, passwords, and ID number.3. Connect to the camera by entering its IP address from the label. (It will be someethinglike 192.168.1.xxx).4. On login screen change language to English.5. Download the video player from the logon option. (This is necessary Active X control).6.Exit from IE explorer and install the player you downloaded. Reboot your computer.7. Relog into camera as in step 1, using pw and IDs from label.8.If you are lucky, you should see a video feed from the camera.9. Set up your wifi. Go to parameters tab on the menus and set up your wifi network ID andpassword. Make sure it connects.10. Disconnect the camera power and internet cable, and install it where you want it.11. Scan your wifi network devices and make sure camera shows up at the expected IPaddress.12. You can now log in and use the camera.(Make sure to change the pw eventually).Notes:1. Above is for PC world only, don't know about Macs.2. Tried the phone mobile app and it worked.3. Video did not show up on laptop with wifi, but worked on desktop with wired networkconnection. Don't know why. Probably ActiveX or bandwidth issue.4. Tried CMS Vision software. Did not work. Ispy and Blue Iris will probably work.5. To view video remotely from outside your home, you will have to port forward your routerconnection.6. If the IP address of the cam conflicts with something you already have, you will have tochange it. 5 & 6 are beyond the scope of discussion here. Contact me.7. You will most likely have to extend the 12v power cord for installation, especiallyoutside.
E**S
I got WIFI to work!!!!
Good image, My DVR is happy with the camera. WIFI, well I can't get it to work. Software is not good. It's a challenge to get motion, email, name anything to work. Xmeye sees the camera on my DVR. For the price, OK. It will work for me.UPDATE!!!! I got WIFI working. On the WIFI page I somehow got the SSID to read my WIFI SSID. I tried all sorts of combinations. I think it was the REBOOT instead of the APPLY. I closed IE and restarted it and I saw my SSID. I did the WIFI testing thing then I unplugged the camera power and the Ethernet cable. Plugged power only back in and when the camera powered up there was WIFI. The Ethernet cable is not plugged in and there is the camera video on my DVR. It seems as long as the camera sees the Ethernet cable while or after powering up WIFI is dead. Buggy software. I may not have given all the steps I took, sorry.
A**R
Video quality is great for the price with good color
Update 10/25/2016:All three cameras I've installed outside are still functioning normally after 4 months. IR LED lights are just as bright as new. Image quality is still great, and no fogging or other effects of weather are apparent. I've switched NVR software to the paid version of Blue Iris, it works much better out of the box than Zoneminder does, but does require the overhead of a Windows installation, but I'm happy with it. The one camera furthest from the WIFI access point does drop it's signal the most frequently, but the combination of camera settings and the Blue Iris software seems to be better at reaquiring camera signal than Zoneminder did. I attribute the frequent drop in signal to the WIFI router I am using (two year old refurb Cisco-branded EA3500, with multiple other devices connecting on the same radio.)I ended up mounting the end of the network/power dongle inside a weatherproof box( Waterproof Plastic Electronic Project Box Enclosure Instrument Case DIY #02 ) with a power cord coming out the other end of the box, and running the thin power cable through the exterior of the house and sealing the hole with caulk.Expect another long-term review after getting a Netgear R6400 and seeing how the cameras perform in the Michigan winter.Original review:PROS: Video quality is great for the price with good color, night vision is SUPURB with super effective IR LEDs (visibly glow red at night). Build quality is excellent, again, for the price, with painted metal housing and mount, with plastic lenses. Ball joint on bottom of camera is painted white, so if you're not careful to loosen the base before adjusting the camera's position, the paint will scrape off of the ball joint, but once tightened is solid. Have had one camera installed outside under a soffit for a few weeks now with no issues at all. Power/network dongle is long enough (~1.5') to run it out of the way of the elements. WiFi antenna receives strong signal, even on opposite side of house from access point (although this is dependent on AP as well.) Video signal very rarely drops out, and only a few frames at a time. I was worried about the non-standard look of the camera, but it's small enough to be discrete, even hanging off an outside corner of a garage.CONS: Lens 'hood' is not rotatable, so camera has to be mounted on either a vertical wall or in the upright standing position for the hood to be orientated correctly to shield lens from weather/sun, although it's so tiny I don't know how much it actually does. Power/network dongle is large, needed to drill two 1" holes side by side to fit through wood soffit into attic, then needed expanding foam to fill hole. I have two more cameras that need to be mounted outside, and I have to get creative with protecting the power/network dongle from the elements, but still leaving it accessible (route into wall mounted waterproof junction box?)Setup: Using ZoneMinder on a Linux virtual machine to configure/record/motion detect video from cameras, so I have very little experience with the built-in software, although for what I have needed it for it's been easy enough. All three cameras built-in software is set to stream at 5fps @ 1920x1080 over same 2.4GHz wifi network. Zoneminder stats show all cameras regularly stream at about 4.5fps, good enough for security cameras.Summary: Pros and price definitely outweigh the cons and extra little things to get these cameras set up. Really the best value for an HD outdoor wifi night vision camera out there that I can find. Time will tell how well they hold up to the elements, but if they are still available in a few years when water/moisture finally wrecks the camera, $68 isn't too bad to replace.
ترست بايلوت
منذ أسبوع
منذ 3 أسابيع
