🔥 Upgrade your ride’s climate control with precision GM power! ⚙️
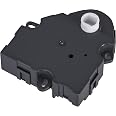
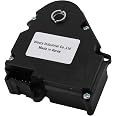
The ACDelcoGM Genuine Parts 15-73952 Heating and Air Conditioning Panel Mode Door Actuator is a GM OE-spec replacement actuator valve made from durable plastic. Measuring 8.25 x 3.25 x 8.75 inches and weighing just 6.9 ounces, it features pin-type inlet and outlet connections for easy installation. Designed to restore proper HVAC mode door function in GM vehicles, it guarantees reliable, factory-level performance and fit.


| Material | Plastic |
| Brand | ACDelco |
| Item dimensions L x W x H | 8.25 x 3.25 x 8.75 inches |
| Inlet Connection Type | Pin |
| Outlet Connection Type | Pin |
| Number of Ports | 2 |
| Outlet Connection Size | 3.7 Inches |
| Specification Met | GM |
| Valve Type | actuator valve |
| Global Trade Identification Number | 00021625560397 |
| Manufacturer | ACDelco |
| UPC | 021625560397 |
| Model | ACDelco - Actuatormode Con (Slp) (15-73952) |
| Item Weight | 6.9 ounces |
| Product Dimensions | 8.25 x 3.25 x 8.75 inches |
| Item model number | 73952 |
| Is Discontinued By Manufacturer | No |
| Manufacturer Part Number | 15-73952 |
| OEM Part Number | 89018374 |
.**D
Works great
UPDATE 01/23/20I've been using one if these as a mode actuator and another as a blend actuator for a few months now with zero issues. No calibration loss in an auto climate control application, great OEM made in Korea product.~~~~~~~~~~~~~~~~~~~UPDATE: 11/08/19: USED AS A BLEND DOOR ACTUATORThis has been running well as mode actuator on an '03 Suburban for a few weeks. I've heard of other instances of this same part being used as a temperature (blend door) actuator and I decided to take a shot and use it for my passenger side blend door actuator with auto climate control. The track that comes with this model pops off the actuator and you are left with just the unit. I was a bit apprehensive about using it in the blend door position, but I just finished the job and it calibrated just fine as a blend door actuator using the same step list below. I used this in place of the original GM p/n# 52402588 that was removed. The job itself took me about 4 hours since I had to remove the passenger airbag and the onstar module takes up a lot of the work space so it was a very tight area, and I did disconnect the negative battery cable for this. I used a pass through ratchet with a 5.5 MM socket to get the mounting screws off, there were only two screws, but a nightmare to get to. I will update in a few weeks to make sure I have no issues using this mode actuator in a different capacity.~~~~~~~~~~~~~~~~~~~~~~~~~~~~~~~~~~~~~~~~~~~~~~~~~~~~~~~~~~~~~~~~~~~~~~~~~~~ORIGINAL:First off, yes, my product was made in Korea, but this does not keep it from being a genuine product. Do some research people.NOTE: REMEMBER TO FULLY INSTALL THE ACTUATOR, DON'T SLAVE IT IN BY JUST PLUGGING IN THE CONNECTOR AND TURNING IT ON, YOU WILL OVER EXTEND THE INTERNAL ACTUATOR GEARS AND MESS IT UP!!I used this as an actual mode actuator for an '03 Suburban with auto temperature control. The mode gear is hard pressed together but it will come apart , just don't pry it side to side, straight up will do just fine. I didn't use the new gear, just the actuator, but after performing the hvac recalibration everything worked great. My mode was stuck in feet only, now it works in all settings. Note: the mounting bolts were 5.5 MM.DISCLAIMER: FOLLOW RECALIBRATION STEPS AT YOUR OWN RISKFor manual systems it does not matter where the a/c controls are set but if you feel the need to do something, turn the blower switch on (I prefer speed 3) and set the temperature sliders about .5″ to .75″ from full cold.For auto systems, press the auto button, with the key on.Turn the ignition off.Remove the HVAC/ECAS , 10 amp fuse in the underhood fuse box* or disconnect the battery for one minute.*Fuse locations can vary from year to year and between different models.Install the HVAC fuse or reconnect the battery.Start the engine. On systems with auto a/c controls the controls will default to 74 degrees F when the ignition is turned back on.DO NOT TOUCH the a/c controls.Let the engine run for 1-2 minutes.Turn the ignition off for at least 10 seconds but no more than 30 seconds.Restart the engine and then test the a/c controls.
D**R
Good
Works great. A bitch to replace, but works
B**C
Perfect fit, AC reset needed to finish install
Exact quality part as the one I removed from my 2005 2500HD. This mode actuator is on the driver's side above the gas pedal. Cam plate should be installed first, check that all vent directions work freely before installing the actuator by holding the cam plate flat while turning between defrost, floor and panel. Viewing the actuator from the gas pedal side, full counterclockwise is for full panel. Tick marks to the left of center. Rotate the cam plate to align the actuator post then you can rotate the actuator and cam plate together to get the two screws aligned.When I first installed this, I could not get defrost until I Googled it to find the reset procedure.To reset, pull the HVAC fuse for 30 seconds, replace it. Fan off, mode to panel, start engine, immediately turn on fan and ac, actuator will blow air from defrost then back to panel, turn off engine. After a few seconds, restart engine and test mode directions. All directions should now be working properly.Good luck! Hardest part is installing the cam plate. Sneak the plate over the gear to engage the cam follower that is on the top of the gear, then sneak the outer cam follower into the outer track, the upper screw post also has a track. This track helps indicate the maximum movement of the cam from defrost to panel air flow.
D**N
Take your time !
Took a few tryst to get it installed , but now the heat goes where it's supposed to go ! Works great !
S**R
will not turn
does not work. will not turn
D**K
Fast delivery
Good deal Good price
A**X
Perfect
This actuator worked perfectly for my 2004 Avalanche. My air would stay in defrost mode. I have tried several of the knockoffs and for under $20 and they did not work. Plugged this part in and it worked the very first time without no calibrating. Don’t waste your time or money with others. Get it done the first time
P**B
Tough install but works
I don't think it's possible to install this without taking the door actuator gear off the motor. On top of that I managed to rotate the motor to a point that it wouldn't align with the actuator gear after it was installed. I had to open the motor case and manually position the gear to the middle of the sweep. Once I did this I was able to line everything up and finish installation. Started vehicle and it went through the alignment process without a hitch. Works like a.champ.They offer this as used, like new and I tried one. What I got was somebody's old broken one they had put in the box and returned. Amazon really needs to look.at their return process. My advice to you is buy new otherwise you'll likely get someone else's broke parts like I did.
ترست بايلوت
منذ 5 أيام
منذ يوم واحد