معلومات عنا
دعم العملاء
احصل على التطبيق

قم بتوجيه الكاميرا لتنزيل التطبيق
حقوق الطبع والنشر © 2024 Desertcart Holdings Limited


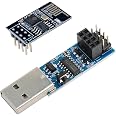
🚀 Elevate Your IoT Game with Effortless Programming!
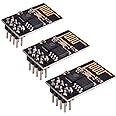
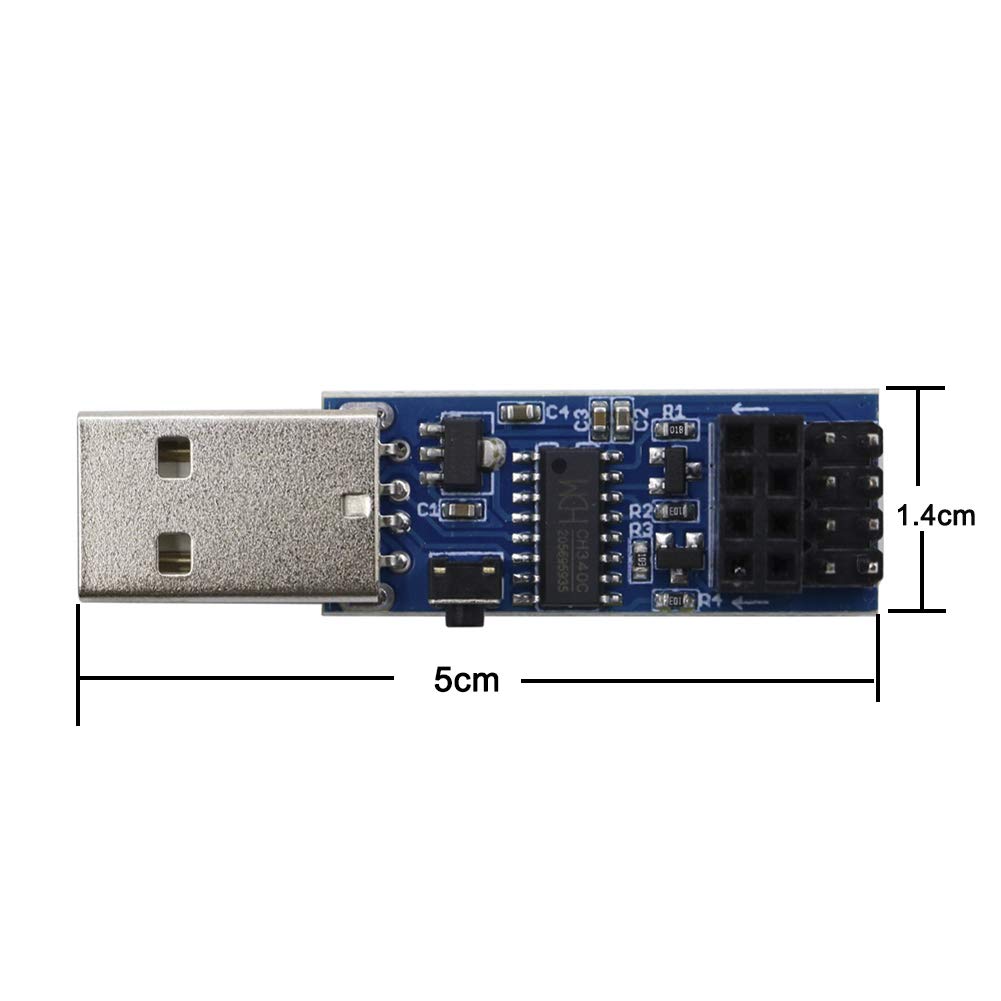
The DIYmall USB to ESP8266 CH340C ESP-01 ESP-01S Breakout Programmer is a cutting-edge tool designed for seamless programming and firmware updates of the ESP8266 WiFi module. Featuring an advanced CH340C chip and an auto-download circuit, this device simplifies the development process, making it ideal for both hobbyists and professionals. The package includes the ESP-01S module and programmer, ensuring you have everything needed to kickstart your IoT projects.
| Brand | DIYmall |
| Item model number | ESP-01S |
| Hardware Platform | Arduino |
| Item Weight | 1.58 ounces |
| Product Dimensions | 1.97 x 0.39 x 0.39 inches |
| Item Dimensions LxWxH | 1.97 x 0.39 x 0.39 inches |
| Color | ESP-01S and Pogrammer |
| Manufacturer | ShenZhen Doctors of Intelligence & Technology Co.,Ltd./DIYmall |
| ASIN | B08F9X3M5J |
| Country of Origin | China |
| Date First Available | August 5, 2020 |
C**C
This one actually works!!
I’ve tried multiple and always thought I was doing something wrong cause none worked. But this one worked first time right out of the box.I’m not going back. Highly recommend it
J**.
No, you do not have to ground the GPIO0 pin. Auto-download works!
The auto-download feature works, but there were a couple of things I had to configure in PlatformIO to get this working. The first is the default flash_mode didn't work -- I had to change it from the default to "dout". Next, I was having to ground GPIO0 to get it into flash mode, until I found the option for this -- the upload reset method needs to be set to "nodemcu". Once I set this, every is working perfectly. Here are my platformio.ini settings:[env:esp01_1m]platform = espressif8266board = esp01_1mframework = arduinoboard_build.flash_mode = doutupload_resetmethod = nodemcuI believe there are similar settings in the Arduino IDE, under the tools menu look for flash mode and reset method. I hope this helps!
P**6
QUICK Flashing/Testing fixture
Love this thing!!! Makes a QUICK job of flashing and testing MCU chips! No more juggling clips, wires and chip to connect up for flashing/testing, not sure if one or more are correctly connected. Just press the chip into the fixture, ALL GPIO's, VCC, GND, etc are firmly attached, EASY to address any contact point with .025 square pin-outs as a bonus! It even has a female cluster for quick attachment of small development boards. With a USB micro to supply data/power, LED lights to confirm communication and power plus buttons for reset and reboot. All mounted on a thick plexiglass base with all contact points labeled. Although I've only run 15 chips through this fixture, I have saved HOURS of setup and REPEAT testing/flashing time! Well worth the money! (fair price also)
C**M
It works.
I have tested this tool using an ESP-01 and some ESP8266MOD (ESP12f and ESP12e) boards.Both worked fine. However when flashing the 8266 I wasted hours troubleshooting a problem only to find out the flexible pins were slightly out of shape and werent making contact with the solder points on the ESP board. The simple fix was to simply keep the ESP slightly elevated in the socket. Once thats done you can plug in the USB cable, press and hold the flash button, then press and release the reset while continuing to hold the flash button. After a brief pause you can release the button and start your programming.Id suggest putting a small shim in the socket area to make it less fiddly when you insert the ESP chip.
I**L
The best USB-UART for programming ESP8266
This is the most convenient USB-UART adapter I have seen for ESP8266. It can control RESET and GPIO0 of the ESP8266, making flashing from most flashing tools fully automatic and painless.The UART is already supported in in the Linux kernel provided with Ubuntu 20.04. No need to install anything, just plug and play. For Windows 10, the drivers will be automatically downloaded after plugin into the USB.It is cheaper and way more convenient than e.g. an FTDI USB-UART. I have flashed many times via this UART and never had any issues.
ترست بايلوت
منذ أسبوعين
منذ أسبوع