🎨 Craft Your Imagination into Reality!
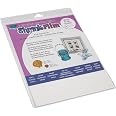
Grafix Ink-Jet Printable White Opaque Shrink Film is a versatile crafting material designed for inkjet printers. Each pack contains 6 sheets measuring 8.5"x11", allowing you to create unique jewelry, embellishments, tags, and ornaments. The film shrinks to 20% of its original size when baked, transforming your designs into durable plastic creations. Easy to cut and perfect for crafters of all ages, this product is made in America and promises quality and fun.


| Manufacturer | Grafix |
| Brand | Grafix |
| Item Weight | 3.98 ounces |
| Product Dimensions | 11.2 x 8.6 x 0.1 inches |
| Item model number | KSF6-WIJ |
| Is Discontinued By Manufacturer | No |
| Color | White (6 Packs) |
| Material Type | Film |
| Number of Items | 6 |
| Size | 6-Pack |
| Sheet Size | 8.5-x-11-inch |
| Paper Weight | 4 |
| Paper Finish | Smooth |
| Manufacturer Part Number | KSF6-WIJ |
N**
My Steps and Tips for this product! 💖
*UPDATED: JULY 2020*This product is AMAZING! I have been using this product for a few years now, and I have loved the results I have gotten from this product. Continue reading for my tips and tricks when using this product!First of all, I print out my designs from my computer to my Canon MX922 printer. I use the Photo Paper preset, but the Glossy Photo Paper preset works the same. A VERY IMPORTANT tip is to lighten the colors. The percentage of lightening the colors can vary, but know that the more you bake your designs in the oven, the darker they become. When I used to bake them for 3-4 minutes, I lightened it by 50%, but now when I bake them for 8-10 minutes, I have to lighten them by about 70%.Second, after I print them, I move on to cutting. The cutting process is self explanatory, but it is also important to HOLE-PUNCH before you bake if you are making keychains. Another thing would be that my hands often times get sweaty when cutting, so I HAVE to wear gloves, since it can leave a yellow stain on your designs.Third, its time to bake! (The most enjoyable part, but can also be stressful for your first time) I pre-heat my oven to 300 degrees, put my designs between 2 pieces of parchment paper, and put them into the oven. People say it takes 2-4 minutes, but for me, it actually takes from 8-12 minutes. It really depends on the size of your designs, so you will have to experiment. After doing this many times, I realized that the longer they are in for, the less imperfections that they have. Again, the most important thing is TRIAL AND ERROR, so find that right temperature for you. Another tip would to be to NOT FREAK OUT. The main reason why most of my charms failed in the oven step was because I was so anxious if they were going to over bake. However, this ALWAYS led to me removing them too early and having failed charms. Just remember that over baking is WAY better than under baking, so there is no reason for you to worry. I did read that someone said that they can burn, which I never encountered, but be cautious! Finally, I quickly remove them from the oven, flattening them with a flat pan/plate. BE WARNED that they cool down VERY quickly, so flatten them quickly.Next, I apply DecoArt Americana Triple Thick Gloss Glaze for one main reason. If you use Mod Podge Dimensional Magic, using it by itself without an under coat will probably make your design smear. This product does make the colors more saturated, so be aware of that! It isn’t my favorite glaze because of it saturating the colors, but I don’t know of any other gloss so I just gotta make do with what I have. I leave it to dry for the whole day or night (10-12 hours-ish), and then move on to using Mod Podge Dimensional Magic.I have to say, Mod Podge Dimensional Magic is very stressful to use. Lots of my charms have failed because of it. The air bubbles are very stressful, but I typically use a needle and toothpick to pop the big ones. If there are some small ones you want to take out, you can scoop them out with a sticker note or paper, which works most of the time. I also had times where the liquid overflowed, so make sure to not overdo it. Another tip I have for this product is that whenever the liquid covers small spaces/crevices, I wait about 1-2 hours for it to set, and then go in with a toothpick to cut the liquid that has fallen in these areas. Using this product can be very stressful, but when done correctly, the end result will be very nice and will leave you satisfied. I let it fully rest for 12 hours before I call it finished.Overall, this product is really fun to use, especially for those who want to get into the art of making charms. I am super satisfied with how my charms have all turned out and very excited to continue making more. A final tip to you all would be to not give up if you mess up. The mistakes are what allows you to learn and become better at doing this. I hope this review helps someone, as knowing some of these things from the start would’ve been so helpful to me. I know this has been long, but thank you so much for reading this! 💖
S**A
As Expected!
I am a former user of Shrinky Dinks and after having a horrible experience with their support on their faulty product, it has prompted me to look into other products. Which I had been aware of this product when Joann's had started to carry it. I have basically every pack they carry, but this one.I received it in the mail yesterday and compared to the two, there is really no difference. Looking at the sheets side by side before printing and cutting, Grafix had a smoother more matte finish, while Shrinky Dinks, you could see manufacturing lines in the finish. But they both bake equally the same.I did notice Grafix does have a slightly rougher texture than Shrinky Dinks, but is a minor oversight.Also, Grafix is made in the USA and I am more inclined to purchase from a company that oversees the whole process and reading from a previous review, will admit fault in product versus putting it on the consumer.The instructions are precise and very thorough. I noticed they suggest using an acrylic sealer, which I went to Joann's and Michaels in hopes of finding the sealant they recommend. (A brushable one) And no dice. I do have several other acrylic sealants in my studio that I plan to test out with this and will post my follow ups as to what worked and what didn't.I did try my Super Gloss Mod Podge and that worked wonderfully as always. I did try Martha Stewart Multi-Surface Durable Gloss Finish and that just pulled the ink color off. Doing a second coat of Super Gloss Mod Podge did make the finish not look so rough.I also cut a corner of Grafix and Shrinky Dinks, baked them both at the same temp, same amount of time and Shrinky Dinks. Both side to side, Shrinky Dinks has a off white hue to the shrunken piece.
D**Y
Grafix Vs Shrinky Dinks - Paper & Sealing Methods
I wish there had been a review like this prior but I guess I will be the first. So what is the true difference between the two types of papers and how do sealants react to them as well. Well, I would like to present my following findings.Grafix Printable Shrink Paper- easy to grab by printers and ink drys on it easily (both inkjet and laser)- bakes fast and easily flattened with pressure when coming out of the oven- when baked and cooled the paper has thickened and is very sturdy - will not chip or bend without real force- if sealed with regular resin or mod podge 3-d dimensional it will look great and stay intact- sealing with UV resin will cause the paper to bend due to the heat and can curl the entire imageShrinky Dinks Printable Shrink Paper- the paper is a little more difficult to grab by printers and the ink will take longer to dry (both laser and inkjet)- bakes faster than Grafix but can smudge if you flatten it too much out of the oven - it must be done slower- the paper bakes thick but not as thick as Grafix, it is also a bit more bendable than Grafix- when it comes to sealants this paper is actually stronger than Grafix - whether it be UV resin, regular resin, or mod podge 3-d dimensional, this paper will not bend or curl during the curing process with any of these methodsSo before you make your purchase be sure to consider the following - they may come in handy.
ترست بايلوت
منذ شهر
منذ أسبوعين