معلومات عنا
دعم العملاء
احصل على التطبيق

قم بتوجيه الكاميرا لتنزيل التطبيق
حقوق الطبع والنشر © 2024 Desertcart Holdings Limited
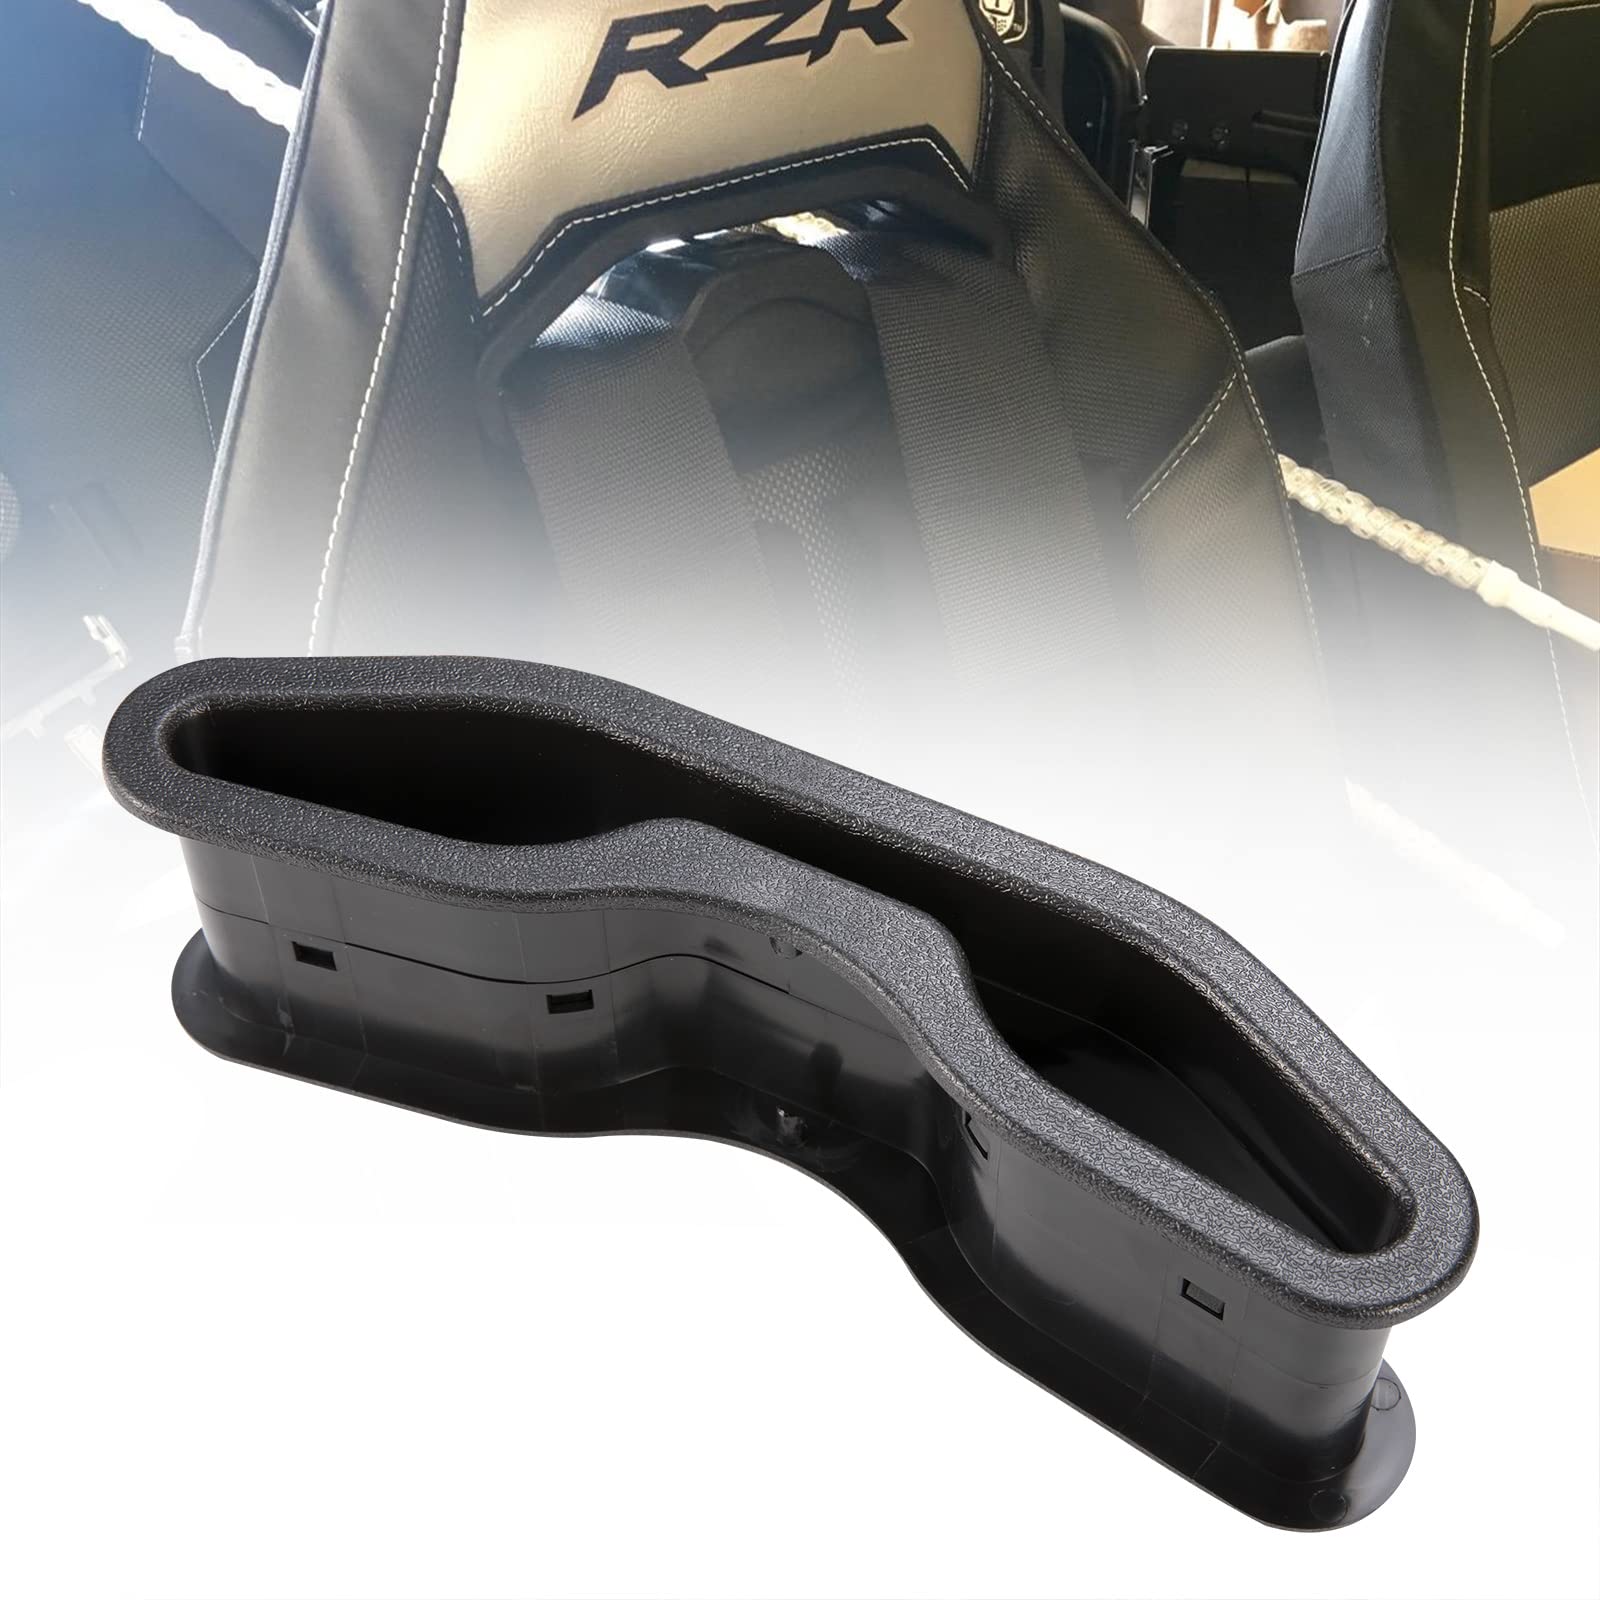


🚀 Elevate Your Ride with Style and Safety!
The KIWI MASTER Harness Pass Through Bezel is designed specifically for 2014-2020 Polaris RZR models, enhancing safety and aesthetics. It prevents harness slippage, offers a stylish upgrade, and ensures easy installation, making it a must-have accessory for any RZR enthusiast.
| Manufacturer | KIWI MASTER |
| Part number | VPHPTB01U |
| Item Weight | 204 g |
| Package Dimensions | 26.9 x 11.5 x 7.1 cm; 204 g |
| Item model number | VPHPTB01U |
| Material | Plastic |
| Item Package Quantity | 1 |
| Batteries included? | No |
| Batteries Required? | No |
K**R
Excellent seat upgrade for such a small price.
Very easy to install and fits nice and snug. A unibit works great for drilling holes all the way around to limit amount of razor knife use. I installed them on my 2018 RZR XP 1000. Great fit
R**Y
Difficult to install and broke a connector
Overall the product is okay. I have a 2020 Polaris RZR XP 4 1000. After my third and forth seat I found a trick for installing the plastic harness pass. Here are comments.1. Use a Dremel tool. fortunately i have a dremel and it worked really well. for the back seat, start off with a soft cut and then redo the next cut deeper until you cut out the hole.2. The front seat cut was easy.. no issues.2. Its not necessary to remove a lot of foam, actually instructions says "don't" but only if needed. I removed very little foam (maybe a 1/4 inch of foam for one seat.. the other seats i removed very very little foam, because I found a trick to installing the plastic harness pass. More Foam allows your seat look plush and a professional install look.3. Here is the my trick or invention. Before you install the harness pass, run plastic bags/strips through the foam padding cutout that you did when cutting the front seat (I used the plastic bags that came with the harness pass. I just made long strips out of them). So I used four strips through the foam (two for top and two for bottom). Then I firmly pushed the two harnesses between the plastic bags. Think of how you make a ham sandwich. The two slices of bread = plastic strips and Ham = harness pass. I pushed the harness between the two slice breads. This allows the two harnesses to easily snap together. you may need to wiggle/pull the plastic strips as you connect the two harnesses. After you successfully snapped the harnesses you can remove the plastic strips by pulling from the front of the seat. Note: as you run the plastic strips through, you may need to tuck the excess plastic strips (of the back side of seat). Tuck two top strips up/inside and the two bottom strips down/inside. That way as you pull the plastic strips out, it will not get stuck by the (back) harness pass. Anyways you may ask why this invention?? Because the first two seats that I did w/o this trick, I broke a connector and cut out more foam then necessary, and the connectors did not fully connect because pieces of foam was preventing the connectors to snap. You will see what I am talking about when you install the harnesses w/o my invention/trick.
A**M
Works great, looks great
Seats look great. Not overly labor intensive, just a quick learning curve on the first seat and the others went much faster. Such an affordable upgrade compared to buying new seats for harnesses.
M**T
Installation
You really need to take your time when cutting the vinyl for this item to fit. You need to do a lot less cutting then What is shown by the picture or diagram given. Even with cutting out less than the diagram it was still too much.You also need to be careful not to remove too much foam.Take your time. I took my time with my first set and it turned out perfect. I got cocky and try to rush the second one took out too much from too much final and now you can see the gap even after I installed these on the passenger seat. I did fill in the missing foam with silicone glue and stick some of the pieces of vinyl that I cut off in the hole to cover it.Just remember that you can always push the foam by the way and make it a tight fit. But when you have to put the foam back because you messed up it looks like crap.
D**K
Functions but needs glue!
These serve there purpose and for the price you can’t complain too much. They are a bit of a pain to install but take your time. I also recommend using some gorilla glue before snapping them together as they don’t like staying snapped together. The glue seemed to have solved the problem. I also sealed the two pieces with black electrical tape after gluing in hopes to keeping most of the moisture out and prevent the internal foam for molding. But they work and works way better with 4 point harnesses now.
ترست بايلوت
منذ أسبوع
منذ أسبوعين