
قم بتنزيل التطبيق


معلومات عنا
حقوق الطبع والنشر © 2024 Desertcart Holdings Limited
قم بتنزيل التطبيق

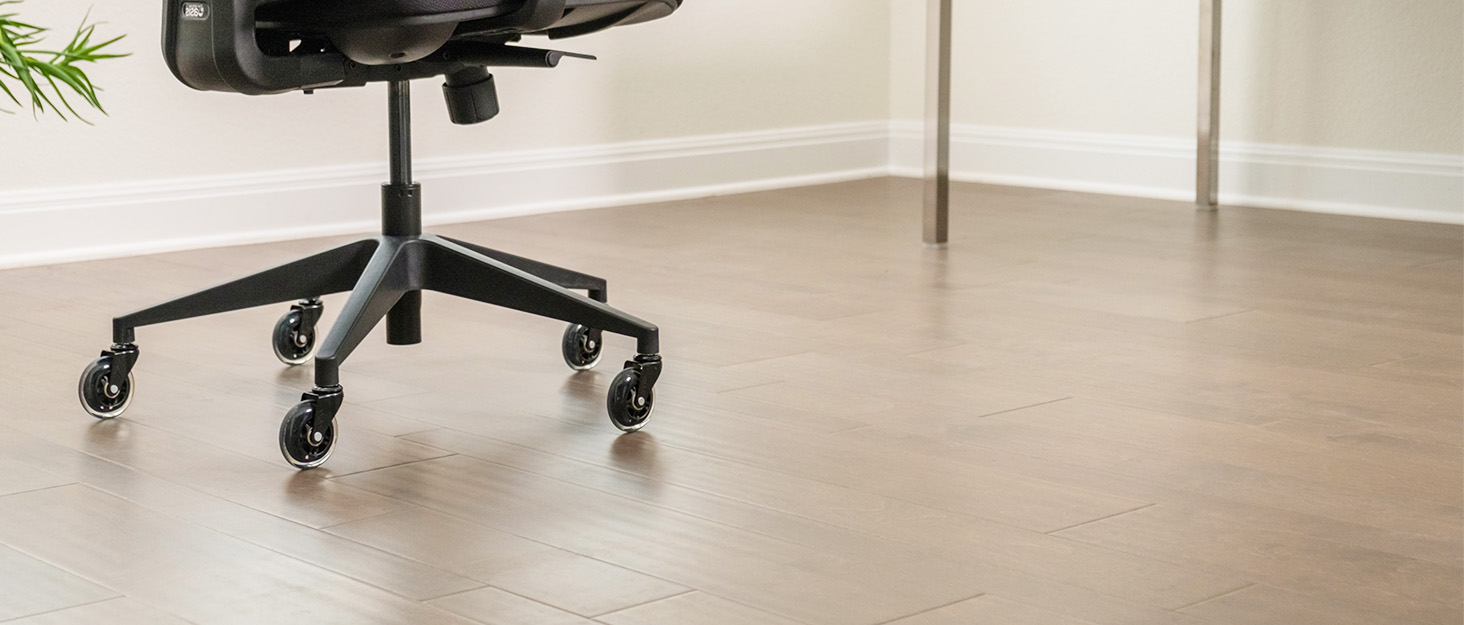
🪑 Elevate your workspace—don’t just sit, upgrade with power and precision!
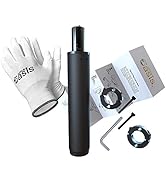
This heavy-duty Class 4 pneumatic gas lift cylinder is a universal replacement for office and gaming chairs, featuring a 28mm piston shaft and 50mm column diameter. It includes an exclusive removal tool and detailed installation instructions, enabling a quick, hassle-free upgrade that supports up to 1000 lbs. Backed by a lifetime warranty, it’s the ultimate cost-effective solution to revive sinking chairs and extend their lifespan.


| ASIN | B01FGLVD6M |
| Best Sellers Rank | #5,532 in Office Products ( See Top 100 in Office Products ) #133 in Office Furniture Accessories |
| Date First Available | May 10, 2016 |
| Is Discontinued By Manufacturer | No |
| Item Weight | 2.5 pounds |
| Item model number | OAS-2010 |
| Manufacturer | The Office Oasis |
| Product Dimensions | 2 x 2 x 15.13 inches |
| UPC | 760842156357 |
P**7
Got a sinking chair? This is the only fix you need!
Fantastic!! I had actually purchased a new adjustable office chair a couple months back. Sure enough, it began to do the "slow sink" and, when turned in a certain position, would drop altogether. I was just about ready to buy ANOTHER one (after leaving a "suitable" review on that chair) when I thought, "What about replacing the cylinder?" So, after a quick search, this video popped up. And I followed the link to the Amazon page. For $30, really...I'll give it a shot. And I am glad I did. Worked/works (so far) just as described. The chair feels new again. Not only that...no "dead" spots and no sinking. Plus...it's actually "taller" when fully raised than the original. Easy to install, much easier than removing. LOL! But the instructions were clear (the video is clearer, just FYI), and it works through even some troubleshooting steps, if you need them. Entire process was maybe 15 minutes. TOTALLY worth it, in every way.
R**C
Wow -- amazing product; easy install & works perfectly. Highly recommended
Every now and then a product just works exactly the way it is supposed to without any unexpected hassles. This $43 purchase is even better than the old cylinder and saved me from having to buy a new $500+ chair! The video and printed instructions were crystal clear and the whole process of removing and installing took a seamless 15 minutes. The gloves were an unused bonus that I will save for future tasks. Plus the package came 2 days early. I can't be any more appreciative of this company.
A**R
Good replacement for Herman Miller Aeron cylinder
My 2002 Aeron cylinder blew (not bad since I sit in it every day and weigh 220, working from home for the past 2 years) so I was looking for a good replacement that didn't require ordering one through the local HM dealer. After evaluating many options I selected the Oasis kit - I looked at some two stage cylinders closer to the OEM but due to either shipment times or functional need (I don't need to go lower) this seemed like a good and affordable option. And the removal kit bits seemed like a good option after watching the numerous videos and reading plenty of forum posts about the difficulty removing old cylinders. Mine has been installed for 20 years, the past two with relatively hard use so I anticipated a challenge and it did not disappoint in terms of difficulty. I'll comment on the cylinder itself, and removal of the old cylinder as separate (but related) issues. The cylinder itself has worked great - as others have noted it does not sit in the base of the Aeron as deeply as the OEM cylinder, thus it does raise the maximum chair height by an inch or two. If this matters depends on the user - for me I wished for maybe another inch with the OEM fully extended - worked fine but the perfect height for my "desk" (a repurposed drop leaf table) would have been a bit higher. So this replacement works well - I have it lowered just a hair as the highest setting is a bit high for my situation but the flexibility is nice. Do note the instructions online for adjusting the lever screw that presses against the cylinder button - I did have to tweak mine a bit as the prior setting for the OEM cylinder was too long and resulted in the replacement not holding the height when seated but it's a quick and easy adjustment - works perfectly now. The button on the OEM part is shorter than the replacement so this was expected - but for anyone wondering the taller button on the Oasis does work with the Aeron! Removal of the old cylinder... I don't have a 12 or 14" pipe wrench and while I have a good assortment of tools wasn't that driven to get one for this project alone (since I've never needed one otherwise in 20 years of home maintenance). Prior to receiving this new cylinder I'd given removal of the old one a go using 10" slip joint pliers, vise grips, with no success. Soaked the joint with liquid wrench penetrating oil and was getting no result whatsoever. Not a budge. Again my old cylinder was well and truly lodged. So I was anxious to try the removal tool included with this kit and using it I was able to dislodge the seat from the post! So it does work - here are some tips for use: first my cylinder had spewed grease/oil when it blew so I found that just wiping the post with a dry paper towel/cloth did not get the post clean enough for the removal tool part that you clamp down to gain a solid grip. I used some simple green degreaser, then a run of rubbing alcohol to insure the post was really clean. Once I did that I was able to clamp down the collar (and do clamp it down tight!) and it held. At that point it was just a matter of slowly turning the "pressure" screws through the collar - 1/4 to 1/2 turn on one, then the other. I did find steady pressure on both sides worked well. If you go in smaller turns alternating each side you'll not need to apply a ton of torque to the allen wrench to achieve a result. I heard a fairly distinct pop when it first started to loosen and then it went pretty quickly - a few more turns and the seat detached from the post. So the removal tool does work with some patience and materials preparation. I've saved it for future use if needed. I do think it was easier than trying to torque it off with a wrench unless you already own a pretty long and heavy duty pipe wrench. Even then the screw pressure requires less oomph overall than even a pipe wrench I would think. Note that the removal tool gets the seat off but does not remove the old cylinder from the wheel base. Given the ability to use a mallet or dead weight hammer on the base (unlike the seat) it probably isn't needed but do expect to spend some effort getting the base removed as well. I used penetrating oil and a rubber mallet with little success. Here are my tips on that part of the job if yours is stuck. First expect to take some whacks at it - like maybe not 2 or 3 ;) I used the edge of my lower deck (around 2 feet off the ground) with some padding to make sure when it released it hit the ground and didn't take off a toe. You'll need a stable surface for sure. I decided to leave mine outside for an hour or two in 40s temps to shrink the metal and that seemed to help. I also alternated hitting the bottom of the cylinder with sitting the cylinder bottom on the deck and alternating hitting the base with a rubber mallet on opposing legs (which gets the benefit of the longer leg leverage, as well as some offset pressure to eventually break the seating). It did eventually release but it does take some time. Have patience! New cylinder install is super easy - I did put some "no seize" lubricant on each end of the cylinder to give some minor aid if I ever need to replace this again - whether it will help I don't know but can't hurt anything.
B**H
Excellent replacement kit
If I ever have to buy another office chair I will be sure to just order this cylinder replacement and install it, not waiting for the one that comes with the chair to fail, which it inevitably will and therefore save myself the hassle of going through the replacement process. Overall, it was easy enough, instructions were great and simple to follow, tool works well, and the cylinder is solid. What I most appreciate is it has added more than an inch of raisable height which for a tall guy (6’ 5”), I’ve never found a chair to go high enough for me. With this cylinder at its highest I’m on my tiptoes while seated. I was so impressed I ended up ordering another cylinder by itself for another of our sinking chairs and the roller blade wheels. All excellent and at a great value.
A**D
The product works great. Tech Support, not so much.
The part itself is good, the toolkit for removing the old cylinder is brilliant, and the process is easy. The only reason I’m rating 4 stars is that the instructions are missing a crucial step, and it took 4 days for their support people to point me in the right direction. Their contact info is in the box and says they will respond 7 days a week, but the reality is that they apparently only look at support issues once a day and don’t really read what you send them so there are lots of go-backs and followup questions that stretch out the process. The problem I had: when I sat down on the chair (Aeron size C) with the next cylinder in it, it sank straight to the bottom. The eventual cause of this? There’s a screw in the chair that controls the height at which the lift lever engages with the button on the top of the cylinder; the new cylinder’s button was basically 1 cm taller than the button on the old cylinder, so even with the life lever in the “lock” position, the chair was activating the button on the new cylinder. Once they said I should check this, it took me 45 seconds to adjust the height of that screw and the problem was fixed. So: a) a mention of this screw in the instructions would have avoided this entire problem, and b) if their support people had been more responsive I could have been back in action in minutes rather than 4 days.
L**N
Excellent product! Worked perfectly for my Osim uterine chair. Easy to follow instructions and great product!
D**H
high quality
A**R
So, I was initially very disappointed as, when it was delivered i thought it was just the cylinder, and was about to start a returns process when i realised everything i needed was shipped inside the single box. The removal kit was a god send. I had struggled for hours before giving up previously, this time the whole thing was off in minutes. Keeping the removal kit in a safe place for future fixes, fields and family.
P**C
First and foremost, item gets 5 stars for customer service alone... Turned out it wasn't a *perfect* fit for my chair — which is my chair's fault, not this cylinder's — but the return/refund process was absolutely hassle-free! Okay, on to the product itself. Now, I don't own a Herman Miller chair. If I did, this might've worked perfectly for me. If I owned a chair that was a little bit fancier that what I bought, or maybe if my chair base was a little more universal, it might've worked perfectly for me. None of that is the cylinder's fault, and I *won't* fault it for that. This review's going to talk about the process I went through from start to finish and let you know why you should still buy this even though it didn't work perfectly for me. Now, TL;DR: The cylinder's great, quality wise, install was *relatively* smooth and easy — though I'm not in the best of shapes — and the final verdict is that it made my chair too tall to be comfortable for me. I had to return it, and the company stood behind their product and their return guarantee 100%. I loved dealing with them and I'm saddened I had to return it... Okay, SO, it turned out my chair's cylinder was going bad — I've owned it for just under three years, but since I'm a Clydesdale of a guy, that probably had something to do with the poor cylinder giving up the ghost early-ish — and I needed a replacement cylinder so I wouldn't have to buy a whole new chair. What do you do? Head to Amazon, pick out the one with the most and best reviews, right? They all kinda look the same anyway. Only, this one *definitely* came with a removal tool, as mentioned in other reviews. (That some *don't* come with the tool, that is.) The removal tool is relatively simple and definitely easy to use: a couple screws slowly but surely un-wedge your cylinder from the seat assembly. I didn't plan as far ahead as I should have so I sweat through the process and space was a little tight to put the allen key in at first, but it worked! Eventually... I ended up bottoming out the screws maybe three times altogether? After the first time, I got a little scared, but I figured I'd just keep going and see if it'd work on the next try. The alternative was sitting on the floor (nuh uh) or waiting a couple more days to be able to sit at my desk (also nope). I might not have bottomed it out on the third attempt, might've only taken two and a half uses altogether, but I basically had to unscrew the screws, move the tool back up, tighten it back down, and start again. When my chair finally popped off, I was so happy and definitely relieved that I trusted the process and just kept going! I'd read a review about it not working for one person, so I can't say it'll work in 100% of cases, but it definitely worked for me. Now, getting my old cylinder out of the chair base was a HASSLE... I tried WD-40, I tried a rubber mallet, then a real hammer with a piece of 2x4 so I wasn't hitting metal on metal... Eventually, I had to pry off the old clip on the underside to get the pneumatic whatchamacallit out of the old metal cylinder and THEN it came off with a couple hammer-smashes. After that, easy-peasy putting the new one into the base and the seat onto the top. Only, it turned out that because my old cylinder was kinda wonky shaped — narrower at the bit that went into the base (about 1 5/8" instead of 2") — the new cylinder couldn't sink as low as the old one (I think?) and my chair at the new one's lowest setting is higher than my old one's highest setting! Forget lifting the chair if I didn't want to feel like I was sitting on stilts and needed a stool to get on and off... So, product worked great, process worked great, it was just the final result that didn't really come out great... My feet can't touch the floor and even when resting on my footrest, it's uncomfortable cause it's so tall. What to do but get in touch with the company and find out where to go from here, right? The packaging mentioned getting in touch via text (wow!) only, the number is in the US and I'm in Canada, and I didn't want to run the risk of long-distance text charges. (Those exist, right?) So I sent them an email. Explained what happened, included a PDF copy of my Amazon invoice and asked for help. I e-mail them at 1:43 am. ALMOST TWO IN THE MORNING! (I keep odd hours these days...) I just so happened to get a reply 30 minutes later!!! Someone over there answered my email at 2:11 AM! Holy cow! Stef at The Office Oasis was so kind, and so professional, it honestly blew my socks off. No muss, no fuss, I had a refund pending the next day! Talk about standing behind your product and your guarantee! That's 5-star service for a customer who isn't really a customer anymore since they (unfortunately) had to ask you for a refund... I *WISH* I could do business with The Office Oasis again... I wish they had any other model of cylinder — like a shorter one — just so I could give them my money. Holy cow. Great team, and I sincerely mean that. Yes, this cylinder's more expensive than some of the ones you might see listed when searching. That's a guarantee you get, though: phenomenal customer service, a warranty, and hassle-free returns should something go wrong. 10/5 stars, the experience left me smiling at the end. Highly recommend.
M**W
Given that this replacing a generic part, I didn’t have great expectations. Boy was I wrong. The first clue was the instructions, large, clearly written, comprehensive. The (essential) accessories where solid and well engineered and the gas strut fits and works perfectly. I’m quite sad that I only get to use this once. I HATE buying new chairs, and now my favorite chair has a new lease of life. Worth every single dirham. Hope my other chair fails soon!
ترست بايلوت
منذ يوم واحد
منذ شهرين