Desert Online General Trading LLC
Dubai, United Arab Emirates
Desert Online General Trading LLC
Dubai, United Arab Emirates

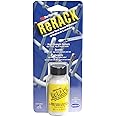
🛠️ Revive Your Racks with Style!
Plasti DipReRack Dishwasher Rack Repair is a flexible, peelable rubber coating designed for restoring vinyl dishwasher racks. It offers superior adhesion, temperature resilience, and user-friendly application, making it an essential tool for maintaining your kitchen's functionality and aesthetics.

| Brand Name | Plasti Dip |
| Model Info | 75815630070 |
| Item Weight | 0.8 ounces |
| Product Dimensions | 6.5 x 2.87 x 1.25 inches |
| Item model number | 75815630070 |
| Is Discontinued By Manufacturer | No |
| Capacity | 29.57 Milliliters |
| Part Number | 630076 |
| Color | White |
| Material Type | PVC |
| Batteries Included? | No |
| Batteries Required? | No |
B**J
Great product!
Bought three of these to help with the rust in our wish washer. Definitely works great but the prep is everything!Make sure to follow the instructions and use it outside or with good ventilation.Stuff stinks.
R**R
Worked well!
Worked well. Happy with the purchase!! I applied 3 heavy coats and let it dry for 48 hours before I used my dishwasher again.
D**A
Very easy to paint on and refurbish your dishwasher rack.
I recently used this paint to repair my dishwasher rack. It definitely works! I had a few Rusty areas and I took the rack out of my dishwasher and painted it and placed it in the sun to dry.I have done many loads since then and it’s holding up well. This is definitely a great product for the money. The brush is in the cap of this just like a nail polish bottle so it’s easy to use and reuse if needed.
P**K
Doing it right with Rerack matters!!
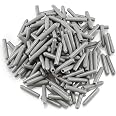
This is the second time I have used Rerack on my automatic dishwasher rack, and I did a much better job this time.It lasted 2+ years the first time, but I expect it to last much longer this time around. Here are my tips for doing your racks.1) Do your prep right. Get 2-3 layers of corrugated cardboard to put the rack on. Use a knife and small cutters (fingernail cutters would do if you don’t have miniature wire cutters) to cut the old coating back to expose the rusted wire rack and rusted welds and leave a neat transition from intact coating to wire.2) Scrape off loose rust with an old knife. Rub the knife back and forth to get a somewhat smooth rusty surface on the wires and welded junctions.3) Use a fairly strong acid (whatever you have) and an eye dropper to put a tiny drop on each of the rusted wire and welds spots you are working on. If you don’t think you have acid at home, you can use Vinegar (acetic acid), car battery acid, or even Diet Coke (contains phosphoric acid); You will just have to reapply more times to remove the rust completely. Applying enough to each spot to where it doesn’t drip off onto the cardboard is the idea. Let it work for at least 4+ hours. Use the eye dropper to reapply to each spot, sparingly as before. There is no need to rise off the acid between reapplying the acid, and no, it won’t bother the vinyl coating, so leaving the acid on overnight between repeated applications is actually good for this process of chemically removing the rust. You cannot overdue it. I used concentrated phosphoric acid, and it took me 4 applications over a couple of days.4) After you are convinced that you have removed ALL the rust, you need to rinse each spot thoroughly with water. The wires and welds won’t be shiny: they should look smooth and black. Dry the rack well.5) Now you need to use some rubbing alcohol and your CLEANED eyed dropper to clean the spots off thoroughly. Then let it dry.6) Now start shaking the little bottle of Rerack vigorously for 5 minutes. There is a BB in the bottle to help it mix thoroughly, and if you don’t mix it thoroughly enough you will only get to use half the bottle before it gums up, and you will need it ALL: if your rack has a LOT of damage to repair, you may need 2 bottles.7) Apply the Rerack with the brush in the bottle top. Use the inside of the neck to remove excess, NOT the top rim of the bottle. Every spot or two you coat with Rerack, screw the top back on and shake the bottle for 10-15 seconds. You’ll be glad later when the bottle is down to half empty if you heed this advice; Trust me.8) Allow 30 minutes between coats and apply enough coats to make the repaired places bigger around than the original vinyl coating, and overlap the intact vinyl 1/8” or more so water can’t wick up under the Rerack and start the wire rusting all over again. Put a little extra where the dishes rest against the rack for padding.9) Let it dry 12 hours or more. I know you are tired of doing dishes in the sink by now, but you don’t want impatience to mess up all your work and effort. Now put some of those little white tips over the end of every wire. They are really sturdy and will keep the wire ends from rusting and scratching the dishes.10) Run the dishwasher empty once before you load dishes on the rack.If there is any Rerack left, keep it where you can find it in case you need to do touch up.This may sound like a lot of trouble and it is, but we have a great old Maytag and you can’t get a replacement rack for a 12-15 year old dishwasher. And the new ones are “water-saving” and don’t have the pump to push the dirty water and food particles through the disposal; you have to empty a trap in the bottom all the time or it bogs up.
B**O
Works, but flawed bottle design needs attention and application is a pain
This product does work, and it's the only product I could find that can endure the high temperatures it'll be exposed to in a dishwasher, but I'm rating it three stars for these reasons:• The bottle's design is flawed• It is an enormous pain to apply since it's the consistency of cold honey (read below for application tips)The bottle is supposed to have a washer that sits on top of it when you unscrew the lid, but after using two bottles of the stuff on my old dishwasher rack, I can tell you with a reasonable amount of certainty that all that washer is going to do is get stuck in the top of the bottle. You can shake it and shake it and do a special dance hoping it'll fall out of the lid, but odds are most people don't even know a washer is supposed to be there. This washer is crucial for two reasons: A) It scrapes excess goop off of the stem when you remove the brush from the bottle B) It significantly extends the life of the product by shielding it from the air. Because the washer gets stuck in the lid, the product dries out and you're dealing with a frustrating half-dried mess of a product once you're 2/3rds into the bottle.If you're covering 30-40 spots, one bottle used carefully should last for two coats. If you have more than that, you'll need two bottles like I did.Application Tips:1) Use sandpaper to clean all rust off of your dishwasher. Don't remove any more plastic than you need to remove. If the plastic is bloated or needs to be removed, pliers and possibly a metal file might be in order. Lightly sand the perimeter of the affected area so the product can grip.2) Clean the metal and surrounding plastic with isopropyl alcohol to remove any remaining rust, dust, or oil from the surface.3) Shake the bottle hard for a couple of minutes. There is a ball bearing in there that will help mix the solvent in with the substance you're applying4) Take a big glob of it and liberally apply it, then spread that glob around, ensuring you overlap it with the existing plastic. It's much easier to use the glob method than trying to paint on small sections at once, because it just smears it around. As you're painting, ensure that you circle the metal with the product, even if the spot you're covering is just a single dot of rust. You want to do this so you form a circle around the metal and the product can be self-supporting vs. trying to cling to old plastic material in a single spot. For the dish prongs, paint at least an inch down the prong.5) For your second coat (and you will want a second coat), you don't have to worry about circling the metal a second time. The product's solvents will soften the top layer of your previous coat enough for it to cling to itself, so you can just paint over only the areas that need thickening, saving you some time/frustration.6) Let it dry overnight as the instructions dictate. I waited two days to be sure that the product had fully cured.It took me hours and hours of work, but I can now use my dishwasher without it putting tons of rust spots on my plates. I've already run a load of dishes and it looks completely unaffected. It seems to work great, but man is it a nightmare to apply! I probably spent 6-8 hours prepping and applying this stuff when it was all said and done.
A**E
Best for your dishwasher
Dries fast. Easy to apply.
ترست بايلوت
منذ 5 أيام
منذ 3 أيام