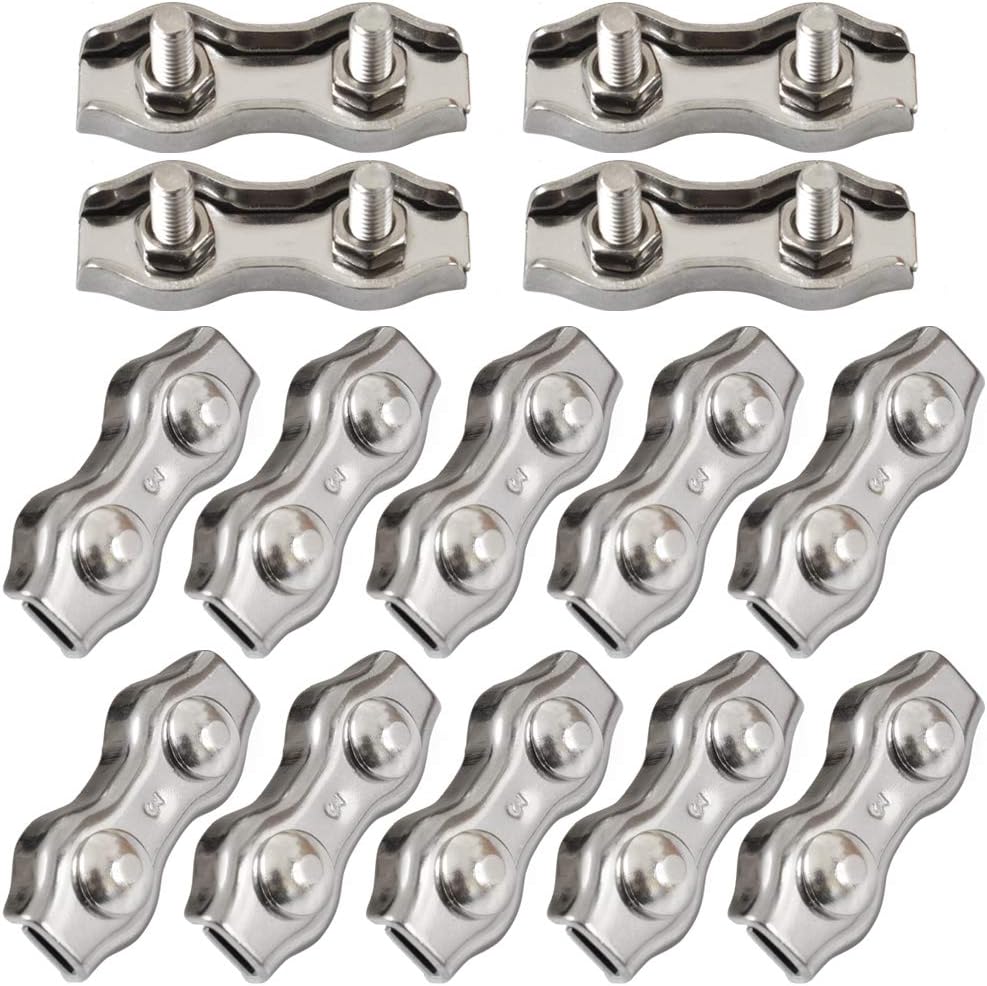




1/8 Inch M3 Stainless Steel Duplex 2-Post Cable Clamp, Wire Rope Clip Cable Clamp, Pack of 14
Product ID: 224656140
🔩Durable 304 SS
⚙️Precision made
🛠️Pack of 14
Desertcart purchases this item on your behalf and handles shipping, customs, and support to Morocco.
🔧 Elevate Your Cable Game!
The Cozihom 1/8 Inch M3 Stainless Steel Duplex 2-Post Cable Clamp is a robust and versatile solution for all your cable fastening needs. Made from high-quality 304 stainless steel, this pack of 14 clamps is designed for durability and corrosion resistance, making it ideal for both industrial applications and home improvement projects. With its advanced polishing treatment and duplex design, it ensures a secure and tidy installation every time.
| Manufacturer | Cozihom |
| Part number | 0690420DCM3 |
| Item Weight | 140 g |
| Package Dimensions | 15.1 x 7.7 x 1.8 cm; 140 Grams |
| Item model number | M3 |
| Material | Stainless Steel |
| Item Package Quantity | 1 |
| Batteries included? | No |
| Batteries Required? | No |
M**E
Recommended
Great bits of kit and work really well.
J**Y
Strong enough to hold up an aeroplane!
I purchased these to secure the lines used to suspend my entry into the annual village scarecrow display/competition. This years theme was ‘when you were a child, what was the job you wanted to do when you grew up’. Unfortunately I didn’t win, but was pleased with the result. I also used them to secure a washing line. Easy to use and clamp the lines well. Recommended.
J**N
Just the job
Better than ones got with wire kit
S**M
Used for wire rope, works great
Used for load bearing wire ropes. Once tightened properly can take a surprising amount of weight. Make sure you tighten fully with the correct sized wire, or the wire will eventually come loose in the wind.
C**N
très bien
parfait pour les cordon à linge solides et détachables
C**E
Muy facil de instalar
Muy facil de instalar
J**.
Conforme
Description conforme, livraison à temps
M**F
Verbinder
Für schnelle Reparaturen super
A**A
Strong mini-clamps - but they need instructions...
First off - the good news: These clamps are really strong, when used properly, and the screws are torqued down to a good measure. With the 1/8" cable I was using, one could probably support my weight easily (I'm a big guy); using two would work even better. But for my needs, one clamp was more than enough (in fact, I ended up using one after I had broken one of the fasteners; the single fastener held up fine - and I'll explain in a bit what happened). The bad news is the reason for the "easy to use" 3-star rating - they are anything but, and that's not the fault of the clamp, manufacturer, or seller - I just didn't realize how difficult to install on 1/8" cable it was going to be. It seemed simple, make a loop, unscrew the clamp, fit it in, screw it down tight. Seems reasonable, right? Well - no. So I'm going to give you all some tips, to hopefully make things easier. It would be nice if the seller included a video showing what to do; maybe I should make one myself... First off - tools - you'll want: 1. A pair of gloves 2. A 7mm socket for a 1/4" handle 3. A 1/4" nut driver (w/ a T-handle would be ideal) 4. A 1/4" socket wrench (if the nut driver doesn't have a T-handle) 5. A pair of channel locks and a standard pair of pliers 6. Alternatively, a pair of so-called "pliers-wrench" may work better in place of the above. 7. Gloves? Use 'em if you want too! Do not substitute needle-nose pliers - they will not work in this application. In fact, you may injure yourself trying. First - if you have a "loose" coil of cable like I did (I bought 100 feet - it came coiled, and held together with zip ties and plastic wrap), be careful with unwrapping it. Keep a good grip on the coil, so it doesn't "unspool" and "bird nest". I found the best way to start was to cut 2 of the 3 zip ties, remove the plastic wrap, and then take a velcro "zip tie" and bundle it with that - then cut the last zip tie. That way, you can keep it from uncoiling, but still remove and let out the amount of cable you need. If you have a large enough space, you could just uncoil the whole thing in a straight-ish line. Whatever you do, don't let it uncoil itself - it's not near as bad as welding wire, but it still can want to get out of hand... 1. The bolts aren't bolts - they are pressed-in threaded studs - and that's a good thing - I can't imagine how hard this would have been using loose bolts... 2. Disassemble the clamp before starting, and put the 3 pieces (2 hex nuts, clamp backing piece) somewhere close by (don't lose 'em!) 3. Cut the cable to length, or leave it on the coil and cut it afterward - whatever you feel is best. Note - you might want to get the proper cable cutters. I didn't, and instead had to use a pair of metal snips, and had to do two attempts to cut the cable - the stuff is tough! Also - you may want to wear some gloves, as the cut end will be sharp (the individual wires that make up the cable are like needles). 4. Form your coil - this takes some trial and error, especially if you want to use a "thimble" on the loop. You need to make the loop big enough to wedge the thimble in place (but still "spring" into place), with enough length to be able to clamp the free end and the other side; when in doubt, use more cable length for the free end, and trim or tape the excess later. 5. Now the tough part - mounting the clamp. I found it was best to mount the clamp on the non-free end side, then bend and mount the other side in place. You want both pieces of cable - the non-free and the free end - to fit completely inside the inner edge of the clamp body. But you'll find the cable won't easily cooperate. 6. Instead, fit the non-free side such that the raised edge ends of the clamp hold on to the cable by friction between the stud and the raised edge of the clamp. 7. Use the pliers to "roll" and fit the cable around the bends of the clamp body "channel". The ends might raise up, so just use the pliers to force 'em down (crimp). You'll need to do this multiple times, but eventually you'll get the cable in place (remember to cuss - cussing always helps motivate the tools and parts). 8. Bend the free end of the cable around to form the loop, and again, fit the cable into the ends of the clamp; basically repeat steps 6 and 7. 9. Remember that the ends may creep up - so be sure to keep 'em forced down using the pliers. 10. The cable at this point should be "flat" inside the clamp, and just below the edge of the clamp, following its contours. You may notice the loop end having (or wanting) to twist 90 degrees perpendicular to the clamp - this is OK, let it happen - just a regular thing when using twisted rope-like stuff (there's a term for this "auto-twisting" but I forget what it is). 11. At this point, there's a lot of pressure on the clamp from the wire wanting to "spring free" of the clamp - so work these steps carefully, but quickly. But if the clamp/cable should pop free, just re-fit things and cuss some more. 12. If you're bare handed, you may be bleeding - a project isn't complete unless you make a blood sacrifice, of course. Cuss some more if you need to. 13. Once the cable is in place inside the clamp, take the "backside" of the clamp, and fit it over the studs, then put on the nuts, finger tight. 14. Put your 7mm socket on to the nut-driver or socket wrench handle. Use the channel locks to hold the clamp by the middle (you should have enough room still to fit the socket on to the nuts and still turn it). 15. Tighten the nuts. With 1/8" cable, you should be able to clamp things down enough that only 1-2mm of thread from the end of the stud to the side of the nut is visible. Use care here; if you really torque things down, you'll break the stud off (like I did - still, the single stud held it all together anyway, for my purposes that was fine). 16. Install a second clamp if needed. 17. Install the thimble if wanted. 18. You might want to cuss some more at this step - otherwise, grab a beer, and drink to a job well done (and then realize you have several more of these to do - sigh). That's basically it. The trick is using the pliers and rolling the cable in place, to make it follow the contours of the clamp body, and doing both sides carefully, so you can put the remainder together and emerge with a strong mechanical engagement. I don't know if I would do this for anything safety critical or such (ie - lifting loads), but for basic usage, it should work fine. Good luck everyone with your projects - and again, remember to cuss and make a blood sacrifice - that's how you'll know you're doing things right!
Trustpilot
1 day ago
1 month ago