
Desert Online General Trading LLC
Dubai, United Arab Emirates
Desert Online General Trading LLC
Dubai, United Arab Emirates
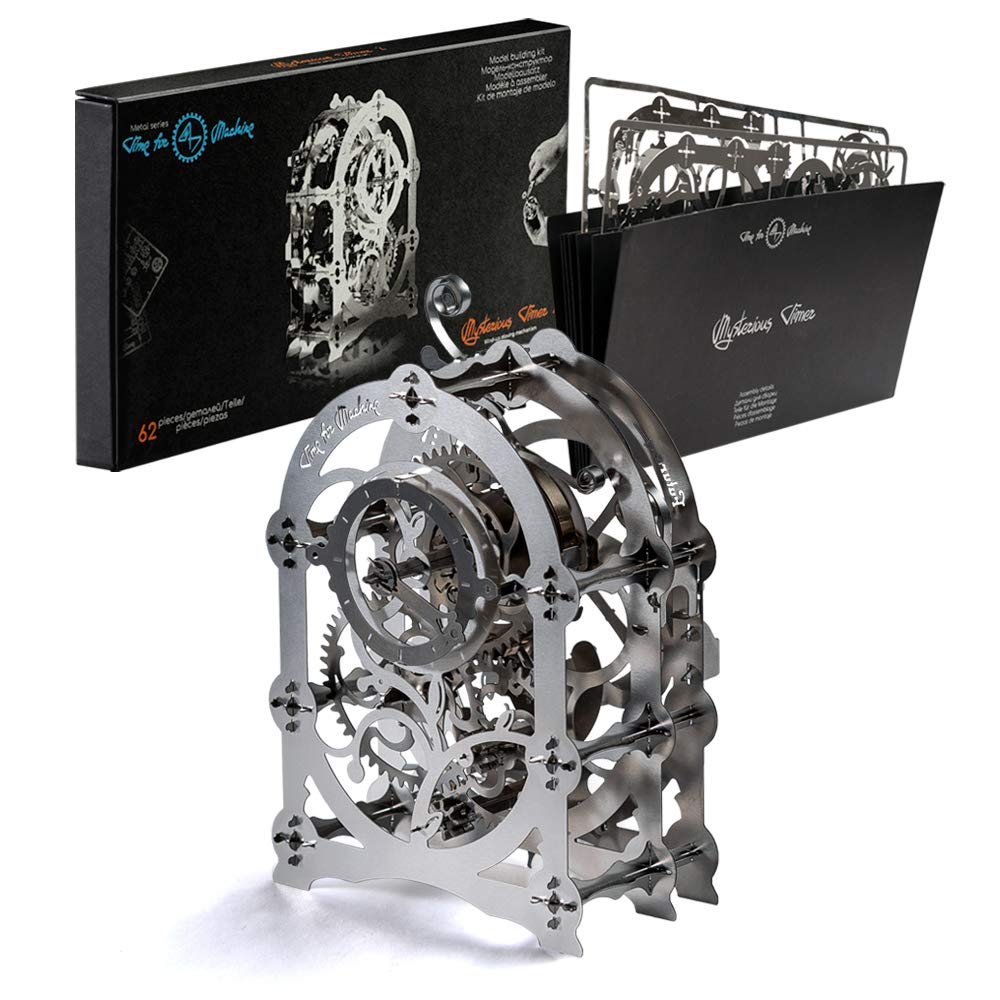


⏳ Time to Create Your Masterpiece!
The Model Clock Kit is a beautifully designed DIY 3D puzzle that allows you to construct a vintage wind-up clock. This moderate-sized collectible not only serves as a decorative piece but also functions as a timer, counting down 60 minutes. It comes with a tool kit for easy assembly and is packaged elegantly, making it a perfect gift for enthusiasts and hobbyists alike.


S**E
Watched the video multiple times
The directions lack detail, I had to watch the video very closely for details that are very important. Go slow. I love the finished clock but it was tough getting it right.
M**Y
Son's will enjoy putting together
gift for my sons
J**L
It is not a clock, it is a timer.
Very meticulous laser cut metal.The instructions sheet is far too small for old eyes, I had to take pictures with the phone and then zoom them to be able to read and understand what the instructions showed.I ended up throwing it away in the end after being unable to complete the spring works assembly.
S**E
Not quality material.
I got this together and it does work but very flimsy. Just tin plate. Gears are a bit clunky when running. I was looking for a brass clock kit when I found this. Not bad for the price but not well made either.
R**N
Not too shabby
Overall this puzzle is pretty fun and is a lot more “sturdy” than other metal puzzles I have put together. The only problem I had is that it is hard to get the gears tight and flush on their shafts. Because of this the clock will want to bind and not work that well. I think I could have taken my time and done a better job instead of getting it finished in about 2hrs.
A**M
Fun build but has its issues
The instructions were clear, and the included tool was adequate, but it is very hard to impossible to get some of the bends right. The fly wheel for example has a weird way it says to tighten that took a lot more strength than a lot of people can use in a very awkward spot. If you just want to build something beautiful this is perfect, but if you want to use it as a timer, just use your phone instead
T**R
cheap
Barely pushed in one tab that holds the spring together and it broke off instantly and rendered the entire modle useless. Built a lot of these types of things. Recommend looking for a different company if this is a hoddy of yours also.
R**Z
Looks pretty but expect no support
Looks nice but needed a replacement part that comes out of Russia and so far after a month have received nothing. Customer service just days it is on the way. Not happy with this aspect
ترست بايلوت
منذ 3 أسابيع
منذ أسبوع