![Alinsea Screen Protector for OnePlus 7 Pro/7T Pro Tempered Glass [Full Adhesive] [Fingerprint Sensor Compatible][3D Glass] Screen Protector for OnePlus 7 Pro/7T Pro](https://m.media-amazon.com/images/I/610TVF6hrNL.jpg)


🛡️ Protect your screen, perfect your touch — don’t miss out on flawless security!
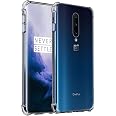
The Alinsea Screen Protector for OnePlus 7 Pro/7T Pro features 9H hardness tempered glass with full adhesive coverage for superior scratch and shatter resistance. It maintains high touch sensitivity and is fully compatible with the phone’s fingerprint sensor. Designed with curved edges for case compatibility, it offers a glossy finish on a 6.1-inch screen, backed by easy installation support.


| Finish Type | Matte |
| Screen Surface Description | Glossy |
| Clarity | 5 |
| Screen Size | 6.1 Inches |
| Compatible Phone Models | Oneplus 7 Pro |
| Special Features | Touch Sensitive, Scratch Resistant |
| Compatible Devices | for OnePlus 7 Pro |
| Item Hardness | 9H |
| Unit Count | 1.0 Count |
| Number of Items | 1 |
| Item Dimensions L x W | 15.9"L x 7.9"W |
| Material Type | Tempered Glass |
P**X
Absolutely PERFECT screen protector!
Alright, I've been trying so many screen protectors for my OnePlus 7 Pro and I guess due to the curved screen, it's hard for manufacturers to get it right or another. I tried three other glass protectors, but they all turned out to have the glue only around the outer edge and it was a black glue strip. So not only did the protector start sliding around after a while, you have a black line around your screen, partially blocking. Plus, no glue on the screen, means you have to press the protector to the actual screen and THEN it registers your finger and they have the grid marks on them for the fingers to work.I then tried the plastic film ones and while they did work better, you get the indentations, the scuff marks and you lose some quality on the screen. Somewhat like an OLED to the old CRT screens, details are lost with them.I had looked over these UV curing kits before and wasn't too thrilled about pouring glue over my phone, having it run off the edges and using a UV light at the same time. But after five failed previous products, I decided to try this one, especially when it was just $10, compared to the others that were as high as $50 for a kit!The description doesn't state it, but this kit comes with just about everything that you need. A pair of new, clean plastic gloves; two sealed lens cleaning kits (each kit has a medium sized microfiber cloth, screen dust stickers and alcohol wipes); the tube of glue; the UV light stick (you need your own USB-C cable and wall adapter); the small assortment of rubber barriers; and instructions.I placed the rubber foam barriers as I saw fit, according to my phone. I used them all up, covering the top speaker right at its very line, the bottom over the speakers and ports, the power button and notification slider, and the volume buttons. I modified as I saw fit and made sure they were completely pressed and blocking off any flow to them of the glue. Meticulously cleaned the screen, then poured the liquid glue as directed, over the center of the screen without squeezing the bottle, while I had the phone sideways in front of me (landscape mode). FYI, I had my phone off during all of this, so it wouldn't register or keep turning on or other during the install. Then placed the screen protector from the side and placed it over the glue.The glue starts moving across the screen and I picked up the phone and titled it as needed, to ensure it reached the entire screen. After making sure it covered the whole screen, I made sure the protector was centered over the screen and fine (I had a bright work light, which GREATLY helps, as the light actually showed where the display screen is and where what little bezel starts at). Once that was done, I used the UV light and started curing the screen for about 90secs, including the edges. I then stopped and cleaned the phone's sides and bottom with an alcohol wipe, while it was still wet. This glue has a smell to it, FYI, so be ready, but I made sure no glue was on the sides or corners or back. Once that was cleaned up (maybe a few mins) and no glue anywhere BUT under the screen, I used the UV light again, moving it slowly across the screen and directing it at the sides as well.It says to spend about 3-5mins curing it, I believe I spent about 10mins, maybe more (oh okay, probably about 20mins) curing it. The UV shuts off after 5mins and you just unplug and plug it back in. It turned off about 3-4 times with me, so yeah, I spent extra time curing it all. I think my phone has a tan line now... I wanted to be absolutely sure it was cured and ready. From start to finish, including unpacking the box, prepping the phone, installing and curing it completely with my curing time (~20mins), it took me 45mins to install this protector. Now, I took my slow slow time, double checked everything, made sure it was correct and did with what my spouse would say is a serial killer's zeal during the install, but it came out unbelievably perfect. It nearly brought a tear to my eye, seeing how it came out, especially after all the previous, failed products.It absolutely looks like there is no protector installed whatsoever. And it feels oh so so very smooth and with finger gliding giddiness, when you're using it. My spouse said she couldn't even tell anything was installed. There's absolutely no bubbles, no marks, no scuffs, no dirt, no dust, NOTHING. I do believe I have never had this measure of success, ever, installing a screen protector before and I have installed probably nearly 100? This is my 8th smartphone, my spouse's 9th, plus all my family members' phones that I've install them one, including glass and film, always something underneath them, always breaking, wearing, scratching, etc. This is just plain superb, honestly.I also have it installed with my Poetic Rugged OnePlus 7 Pro case with no issues, but I have removed the installed screen protector from the Poetic case and cleaned the glue on the inside of the case. The case rides/sits on the protector itself and doesn't pick or lift the screen protector whatsoever. Some of the other glass protectors I had, the case was picking or sliding it sometimes. With the Alinsea one, the Poetic seems like a destined marriage with it, it's great.So, all in all, a little tedious install process, especially if it's your first time with such a UV kit, but in my opinion, it was well worth it. Also, I have dropped my phone about 3x since it's been installed and it hasn't cracked or chipped, still perfect. Of course, with the Poetic Rugged case and this screen protector, my OnePlus 7 Pro is built like a tank now, so I'm not surprised it's still fine. I mean, it better be! I just spent all this time installing it all!
Q**H
Best screen protector but don't make this mistake...
Ok, so I had one on my phone for probably 2 years. Worked great, made my slightly scratched screen look new and protected it. Dropped a couple dozen times, cracks in the protector but not the screen itself. Perfect. Decided to remove it and put a new one because of the cracks. Easy enough to remove. No problem. But installing the next one gave me issues. Followed the video exactly, etc. But one thing they don't cover is what to do if air bubbles appear immediately after placing the protector? I thought they would go away when the liquid spread over the screen. But they didn't. 2 big bubbles right in the middle where I poured the liquid. So, I think that by squeezing every drop of liquid out of the tube, I created some bubbles in the puddle of glue that sits in the middle of the screen before placing the protector. Placing the protector doesn't make these bubbles go away. The puddle needs to be free of bubbles before placing the protector. Not sure how one would do that exactly but anyways, messed up the install and bought another one. Didn't return the 1st as I considered it potentially user error. This time, I carefully poured the glue liquid on the screen taking care not to make bubbles by squeezing every drop out. There's actually too much if you squeeze every drop. The last install had glue pouring out all sides (cover those buttons well). So, this time I had a bubble free puddle. I guess by releasing the protector onto the screen too fast, it created a couple small bubbles. Again in the middle, not the edges. And they don't go away. So I lifted up the protector gently while it was still wet and I could see the bubbles adhere to the protector and not the screen, so I wiped the bubble away with the provided cloth and lowered the protector again. Same problem, had a new bubble appear as soon as I had the protector make full screen contact. Again, lifted and cleaned the bubble off, then very very very slowly and gently released the protector onto the screen using their provided screen protector ramp tool thing that you remove as it lowers the protector onto the screen. I did this super gently and slowly. On this third try, no bubbles, liquid spread to all edges (with a little tilting help by me as I was afraid that I lost some glue with my 3 attempts of lifting and wiping glue off the inside of the protector to get the bubbles off) and voila! I have a perfect screen again that is slick, smooth, easy to clean, makes it look new again and made of pretty durable glass. I do think this is the best screen protector for this phone but there are definitely challenges with installing. If you follow their video and simply add this caution about the bubbles to your steps, then you should be good to go. Worth it if you can get it installed properly. If the bubbles are on the inside of the protector, you can just wipe it away gently with the cloth. Don't be too aggressive. Just need the bubble gone. If the bubble is on the screen itself, can probably just use the tip of the glue dispenser bottle to pop it. Definitely wouldn't wipe the puddle of glue with a cloth if the bubble is on the screen itself. That would make a mess probably.
ترست بايلوت
منذ أسبوعين
منذ شهر

![Alinsea Screen Protector for OnePlus 7 Pro/7T Pro Tempered Glass [Full Adhesive] [Fingerprint Sensor Compatible][3D Glass] Screen Protector for OnePlus 7 Pro/7T Pro](https://images-na.ssl-images-amazon.com/images/I/610TVF6hrNL._AC_UL116_SR116,116_.jpg)