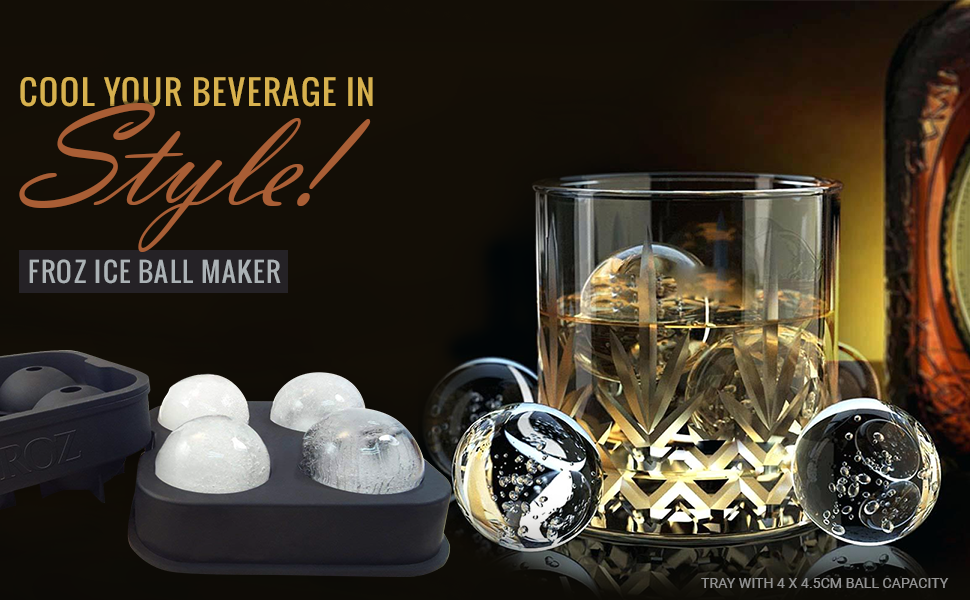
🧊 Elevate Your Chill Game!
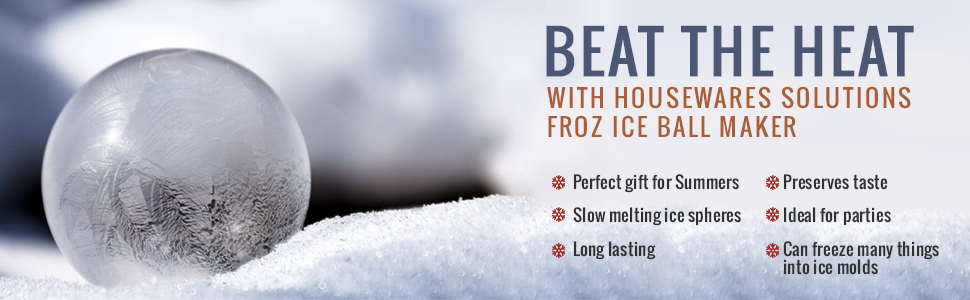
The Housewares Solutions Froz Ice Ball Maker is a premium food-grade silicone ice mold tray designed to create four elegant 4 x 4.5cm ice spheres. Ideal for a variety of beverages, this versatile tray is dishwasher and microwave safe, ensuring easy cleaning and reuse. Its sturdy, leak-proof design guarantees perfectly seamless ice balls that won't crack or tip over in the freezer. With a 100% lifetime guarantee, this ice mold is perfect for entertaining and adds a touch of sophistication to any drink.
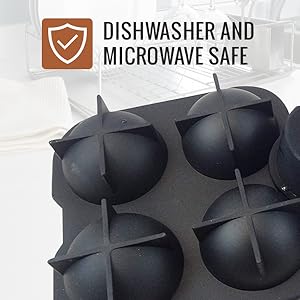
Is the item dishwasher safe? | Yes |
Material Type Free | BPA Free |
Material | Silicone |
Item Dimensions L x W x H | 4.8"L x 4.8"W x 2"H |
Item Weight | 5.92 ounces |
Shape | Round |
Color | Black |
V**A
Perfect Playtime Adventure; The Ice Ball Maker for Toddlers
I got The Ice Ball Maker for my toddler, and it’s been a huge hit! We put small toys and dinosaurs inside the ice spheres, turning playtime into fun excavation adventures. He loves using his little hammer to chip away at the ice and find hidden treasures. It’s not only fun, but also helps improve his fine motor skills.The ice balls are easy to remove, and using purified water makes them nice and clear, which looks great. I highly recommend this for parents looking for a fun and educational activity for their kids!
J**E
Ice ball maker
As described. Very convenient for us.
C**R
Ice cubes
Nice product.
A**R
Doesn't work
Not good.
S**B
Housewares Solutions Froze Ice Ball Maker
The Housewares Solutions Froz Ice Ball Maker is a fantastic addition to any kitchen or home bar. Its food-grade, BPA-free silicone design ensures safety and durability, while its leak-proof construction makes it easy to use. This ice mold creates four perfectly round ice balls at a time, which melt slowly and keep drinks chilled without diluting them. It's versatile too—you can freeze not just water but also jelly, chocolate, or even soap!I love how easy it is to clean, as it's dishwasher and microwave safe. The sleek design and professional-grade quality make it a favorite for parties, summer gatherings, or simply elevating your everyday beverages. It's a small but impactful tool that adds a touch of elegance to any drink. A must-have for anyone who enjoys entertaining or crafting the perfect cocktail!
W**E
Best Surefire Way For No Rings
Following the instructions, it recommends that you fill the bottom half of the mold with water up to the top of the line on the bottom molds, which should be all you need. Didn’t make a whole lot of sense to me but I did that and aligned/put the top mold on top of the bottom mold, when I did that the water from the bottom mold did push the water up and filled the top mold to the top ice ball hole/nipple. Pretty cool how that worked. The only problem with that and I did not realize it until all my ice balls where done and I cracked them out of the mold. You will definitely have a ring around your ice spheres if you don’t make sure that when you do set that top mold down it needs to marry up with the bottom mold seams perfectly all the way around each of the individual 4 ice molds.Technically speaking the top and bottom molds has a tongue and grove indent (the seam) that when closed properly is supposed to snap flat and flush together to keep the water isolated and contained to each sphere when freezing, if these two pieces has a gap in it and not properly seated you will get that ring around your ice ball without fail. Found that out after all mines came out with that crazy size ring around them. I then realized that I didn’t make sure the two pieces was snapped securely together. BUT……….per instructions that is pretty hard to do when it is filled with water, there is a learning curve and process that goes with that.I recommend ditching the instructions and just do like I figured out how to fill these molds to get perfect round spheres, ring free. Now we are doing the opposite of what the instructions is telling you do. Take the two molds and put them together,( You’re doing this with NO WATER IN THEM) take your fingers and go around each of the four molds snapping them flat and flush, you should hear and feel it going flat as you go around each one. You should also see both bottom and top lips of the molds perfectly kissing each other with no raised portion on them all the way around the mold, if you seated each mold correctly. Take your water and fill up each of the four molds through the hole/nipple on the top, fill the water all the way until it just overflows out of the holes. Don’t worry about over spills in the tray until you filled up all four molds. If you care you can take your thumb and index finger from both hands and cover up all four holes at the same time and flip the mold over to drain out the overfill water in the tray before you stick it in the freeze, trust me you will not see any more or a whole lot of water in that tray when you take it back out the freezer. What you will have is a perfectly round (not deformed) ice balls, with no rings. ‘NO RINGS’.By the way I did use purified water (Dasani) for testing, it was an improvement but I wouldn’t go out the way and say that’s the way to go.
M**Y
Hielera
Me encanta para mis bebidas favoritas los amo
W**D
Easy to Use, Great Value, FOLLOW DIRECTIONS
These are an excellent value, and easy to use. It takes a try or three to get the hang of how to fill them just right so that you don't get a little stem. But, this is purely cosmetics -- ice is ice, and only as good as the water you use (we use filtered water, but boiling your water twice gives the BEST ice [look it up]).if you are a whisky drinker, this ice ball maker makes the perfect ice for your next dram.=========Update 2/12/2015Ok, it is clear by reading some of the more negative reviews that people just don't read directions, and complain about the results here. Here is a quick run-down:1) Clean the trays with hot water and soap, rinse and dry them thoroughly. Do this EVERY time. If you just rinse them, you won't get the results you expect. This is because as water freezes, it slowly pushes impurities away from the frozen parts. This is what gives a cloudy center. But it also pushes some impurities outward, and they adhere to the mould, causing uneven freezing next time. uneven freezing will cause the ice to fracture, splitting into pieces. So, WASH.2) Fill the bottom tray without the top of the mould in place -- don't try to pour water in through the little holes (read the directions). You will need to fill it to about 1/4" above the flat area.3) If you want clear ice, you either need to boil your water twice, or used distilled water.4) If you want VERY clear ice, you need to allow it to freeze from one side toward the other. This is called "directional freezing" and it is what professionals use to make the clear ice you see in sculptures, etc. -- most of them use elaborate combinations of open-top coolers to do this.Fortunately, this is quite easy with this mould, because of the shape of the top. Here is what I do:a) Boil the water in a pyrex measuring cup using the microwave.b) Pour about 7oz of the still HOT water into the mould (you will HAVE to adjust this to figure out what works for you -- because of various differences your amount may need to be slightly more or less).Now put on the top of the mould.c) COVER the top of the mould to seal the airspace -- tinfoil will do. I actually found a 5"x5" box and cut it to make a "top." This will seal the air space above the balls, which will create an insulating affect on the TOP only, leaving the bottom exposed.d) Place the sealed or covered mould on a TOP rack in your freezer, so the underside is as exposed as possible.By sealing the top, and exposing the bottom, your water will freeze from the bottom up, pushing the cloudy bits toward the top (and some of it out of the top), so that you will get mostly clear ice, with a small cloudy bubble patch at the top.It takes mine overnight to freeze, your timing might vary depending on the temperature of your freezer.e) Remove from freezer, grasp the edges and lightly twist the mould to break away the ice that remains in the seams surrounding each ball -- this part is in the instructions included in the mould.
ترست بايلوت
منذ 4 أيام
منذ يوم واحد